

BLOG
Discovering water pooling around the faucet base on your new vanity top is a frustrating experience that often signals a simple installation oversight or a minor component failure. While a brand-new fixture should theoretically be watertight, small gaps in the mounting seal or loose connections can lead to moisture accumulation that threatens your countertop finish.
Understanding why this happens allows you to address the issue before it causes permanent water damage to your cabinetry or vanity material. This article explores the common mechanical culprits behind these leaks and provides practical, step-by-step solutions to ensure your bathroom faucet remains dry and functional for years to come.
Immediate Causes of Leaks at the Faucet Base
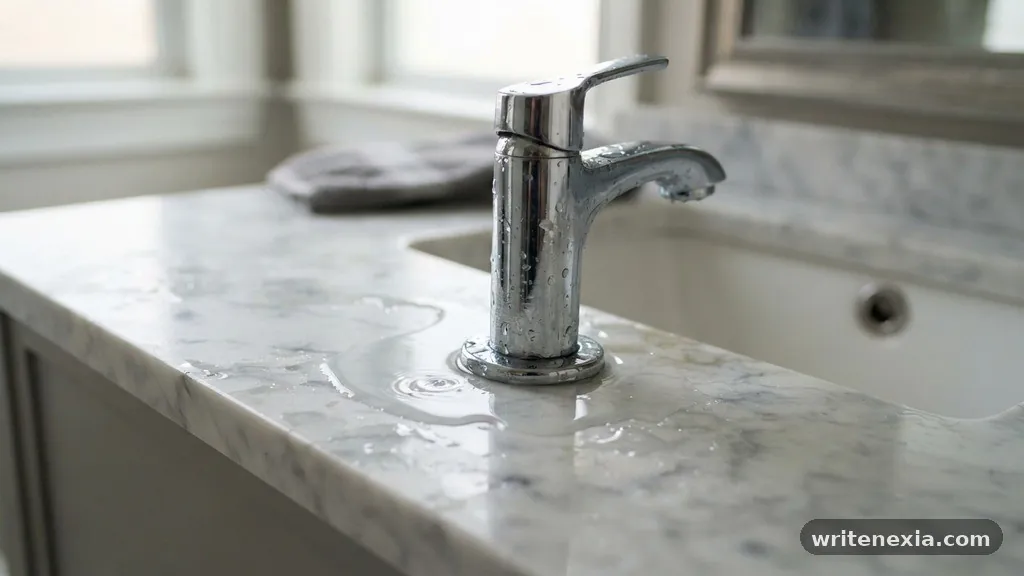
The most frequent reason for water pooling around the faucet base on your new vanity top is a compromised gasket or an improperly tightened mounting nut. When a faucet is installed, a rubber or plastic gasket is intended to sit between the metal base and the countertop surface.
If this gasket is misaligned or pinched during installation, it creates a direct channel for water to seep through the hole. Even a tiny misalignment can allow capillary action to draw water from the deck onto the vanity surface.
Another common culprit is the failure to use plumber’s putty or silicone sealant where the manufacturer requires it. Some modern faucets rely strictly on integrated rubber gaskets, but many still necessitate a bead of waterproof silicone to bridge gaps in uneven stone or laminate counters.
If the installer skipped this step, water splashing near the handle or spout can easily find its way underneath the base. Once water is trapped under the decorative plate, it often sits there until it eventually migrates outward, creating the appearance of a persistent leak.
Loose mounting hardware is also a major factor that homeowners often overlook. Over time, or due to insufficient tightening during the initial build, the nuts holding the faucet to the vanity can back off slightly.
This vibration and lack of tension break the seal between the gasket and the sink deck. If you can wiggle the faucet base even slightly with your hand, the mounting hardware is almost certainly loose and requires immediate adjustment to stop the water ingress.
Checking the Internal Cartridge and O-Rings
If the mounting hardware is tight and the gasket is properly seated, the leak may originate from the internal components of the faucet itself. A faulty cartridge or worn-out o-rings often cause water to leak internally and drip down the faucet shank into the cabinet or onto the top.
This is particularly common in high-end units where a manufacturing defect in the cartridge seal might not show up until the faucet has been under pressure for a few days. If you notice water around the handle area, it is a strong indicator that the internal seal is the primary failure point.
When the internal cartridge fails, water may bypass the valve seat and travel down the stem of the faucet body. Because the faucet body is hollow, this water eventually exits at the bottom where the assembly meets the countertop.
To determine if this is the cause, dry the area completely and wrap a paper towel around the base of the handle. If the paper towel becomes wet while the faucet is turned on, the leak is internal and you likely need to replace the cartridge rather than resealing the base.
O-rings located within the faucet body also serve as critical barriers against water migration. These rubber loops degrade over time, but on a brand-new vanity setup, they might be defective or improperly lubricated from the factory.
If you have a Moen or similar brand, these parts are often modular and designed for easy servicing. Replacing a faulty cartridge or set of o-rings is usually a straightforward task that doesn’t require professional plumbing services, provided you have the correct manufacturer-specific parts.
Comparing Potential Leak Sources
Identifying the specific source of water pooling requires a systematic approach to elimination. The following table outlines how different symptoms point to specific mechanical failures, helping you narrow down the repair process.
| Symptom | Likely Cause | Recommended Action |
|---|---|---|
| Water appears only when the handle is moved | Handle O-ring or cartridge failure | Replace the internal cartridge |
| Water pools after washing hands | Inadequate base gasket seal | Apply silicone sealant under base |
| Faucet base wiggles slightly | Loose mounting nut | Tighten hardware underneath |
| Constant drip from the spout | Damaged aerator or valve seat | Clean aerator or replace valve |
The Role of the Aerator and Spout
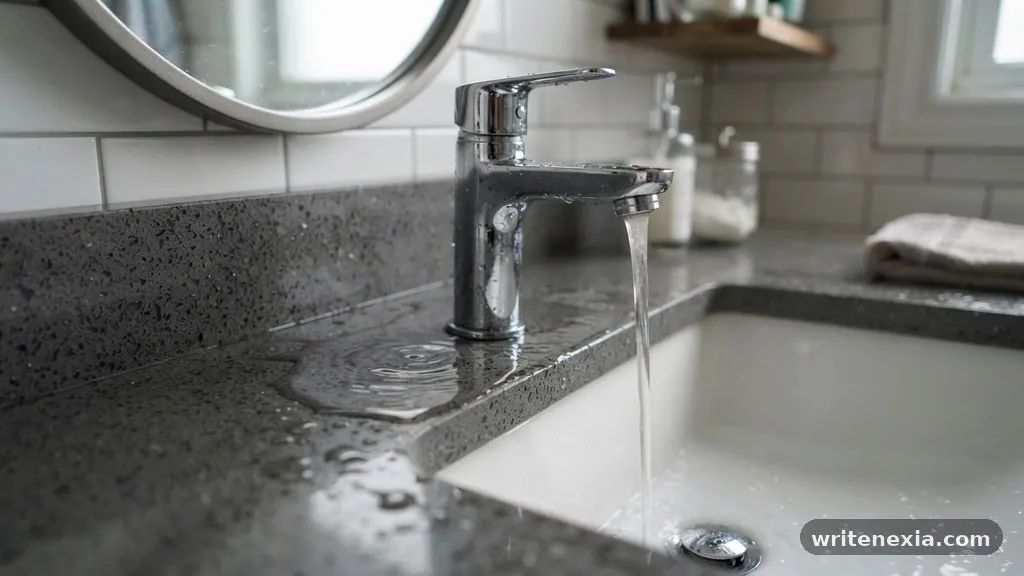
Sometimes, the water isn’t actually leaking from the base at all, but rather being directed there by a malfunctioning aerator. If the aerator is clogged with debris from the new plumbing lines, it can cause the water stream to spray or flow unevenly.
This erratic flow often hits the edge of the sink or the handles, splashing water onto the countertop. When this happens, it looks exactly like a base leak because the water naturally flows toward the lowest point, which is the intersection of the faucet and the vanity top.
Checking the aerator is the simplest diagnostic step you can take. Unscrew the aerator from the end of the spout and inspect it for mineral buildup or construction debris. If you find debris, flush the faucet without the aerator attached for a few seconds to clear the lines.
After cleaning or replacing the aerator, observe the water flow to see if the erratic splashing stops. This simple maintenance task solves a surprising number of “leak” complaints that are actually just issues with water trajectory.
Addressing Loose Mounting Hardware
If you determine that the mounting hardware is the problem, you will need to access the underside of your vanity. This often involves clearing out storage space and using a basin wrench to reach the nuts securing the faucet shanks.
Ensure the faucet is perfectly centered before tightening the nuts, as any tilt can prevent the gasket from creating a uniform seal. Do not overtighten the nuts, as this can crack delicate stone or porcelain countertops, which would be a much costlier repair than a simple leak.
Once the nuts are snug, check the stability of the faucet from above. If the base remains firm and does not move under light pressure, the seal should be restored. If you still see water pooling, consider applying a thin, clear bead of bathroom-grade silicone around the perimeter of the base.
This acts as a secondary defense, preventing any surface water from finding its way into the mounting hole. Ensure the surface is completely dry and free of any dust before applying the silicone to guarantee proper adhesion.
When to Replace the Faucet
In some cases, the issue may stem from a manufacturing defect in the faucet casting itself. If you have tightened the hardware, replaced the cartridges, and applied sealant, yet water continues to appear, there may be a hairline fracture in the faucet body. This is rare, but it does occur in low-quality or damaged units.
If the faucet was purchased very recently, check the warranty information provided by the manufacturer. Most major brands offer replacements for units that fail within the first year of operation.
Before deciding to replace the entire fixture, document the issue with photographs and notes on your troubleshooting steps. This documentation is invaluable if you need to request a warranty claim or return the product to the store.
Replacing a faucet is a significant task, so ensure you have exhausted all other repair options before committing to a full replacement. If you do choose to replace it, look for models with solid brass construction to minimize the risk of future structural leaks.
Common Mistakes During Installation
Many homeowners inadvertently cause leaks by failing to follow the manufacturer’s installation manual exactly. Every faucet has specific requirements for the size of the mounting hole and the thickness of the deck.
If the hole is too large, the base plate may not cover the gap entirely, leaving a path for water. Furthermore, failing to use the provided rubber washers or spacers on the underside of the vanity is a common oversight that leaves the faucet unstable.
Another frequent error is the improper use of Teflon tape. While Teflon tape is essential for threaded pipe connections inside the wall, it should never be used on the connection between the faucet and the supply lines if they utilize rubber gaskets.
Over-applying tape can prevent the gasket from seating properly, leading to a slow drip at the connection point that eventually migrates to the vanity top. Stick to the manufacturer’s guidelines regarding thread sealant to ensure every joint is watertight.
Preventing Future Water Damage
Protecting your vanity top from water damage goes beyond fixing the faucet. Even a perfectly installed faucet can splash, and leaving standing water on a wood or stone vanity will eventually degrade the finish.
Always keep a small cloth nearby to wipe down the area around the faucet after use. This simple habit prevents moisture from sitting on the surface and finding its way into the seams of your vanity.
Consider applying a high-quality sealant to your stone or wood vanity top once or twice a year. This creates a hydrophobic barrier that causes water to bead up rather than soaking into the material.
If you have a marble or granite top, a professional-grade sealer will protect the stone from etching and staining caused by soap or hard water. Maintaining the vanity surface is just as important as maintaining the hardware attached to it.
Tools Required for Troubleshooting
Having the right tools on hand makes the job of diagnosing a leak much easier and safer for your fixtures. You do not need a professional-grade workshop to handle these repairs.
Most tasks can be completed with a standard toolkit that you likely already own. Here is a list of essential items to keep in your home for plumbing maintenance:
- Adjustable wrench for tightening nuts and supply lines.
- Basin wrench for accessing hard-to-reach mounting hardware under the sink.
- Silicone sealant for creating a waterproof barrier at the base.
- Flashlight or headlamp to see clearly inside the dark cabinet space.
- Paper towels to test for leaks and keep the workspace dry.
- Replacement cartridges or o-rings specific to your faucet brand.
Frequently Asked Questions
Why does my new faucet leak only when I turn it on?
If the leak only occurs while the water is running, it is likely an issue with the internal cartridge or a loose connection on the supply line. Check the cartridge for a faulty seal, as this is the most common cause of pressure-related leaks.
Can I use silicone on every faucet base?
While silicone is excellent for sealing gaps, check your faucet’s manual first. Some high-end fixtures are designed to drain water internally, and sealing them with silicone can trap water inside the body, causing premature corrosion.
How do I know if my faucet mounting nut is loose?
Place your hand on the faucet base and try to gently rotate it. If the entire unit moves or rocks, the mounting nut under the sink has likely loosened and needs to be tightened with a basin wrench.
Is it normal for a little water to stay under the base plate?
No, it is not normal. A properly installed faucet should have a watertight seal that prevents any water from getting under the base plate. Any water found there indicates that the seal is compromised.
What should I do if the leak is coming from inside the wall?
If the leak is originating from the supply lines behind the wall or in the floor of the vanity, shut off the water supply valves immediately. This type of leak requires professional attention to prevent significant structural damage to your home.
Conclusion
Dealing with water pooling around the faucet base on your new vanity top is a common annoyance, but it is usually manageable with a bit of patience and the right diagnostic approach. By checking your mounting hardware, verifying the integrity of the internal cartridge, and ensuring the base seal is watertight, you can stop the moisture from damaging your investment. Remember that the smallest gaps often lead to the biggest problems, so addressing these leaks early is the best way to preserve your bathroom’s appearance.
If you follow the steps outlined, you will likely find that your faucet is back to functioning perfectly without any persistent drips or puddles. Should the issue persist despite your best efforts, do not hesitate to contact a professional plumber to prevent long-term structural harm.
Choosing the best Heavy-Duty Steel Brackets for Supporting Granite Vanity Tops is a critical decision that prevents cracking and ensures your bathroom remains safe for years. Because granite is exceptionally heavy and prone to snapping under its own weight if left unsupported, installing the right hardware is essential for any successful renovation.
By prioritizing structural integrity and correct placement, you can avoid costly repairs while achieving a sleek, professional look. This article provides the technical details you need to select, space, and mount high-quality steel supports that keep your stone surfaces stable and level.
Weight Load Requirements
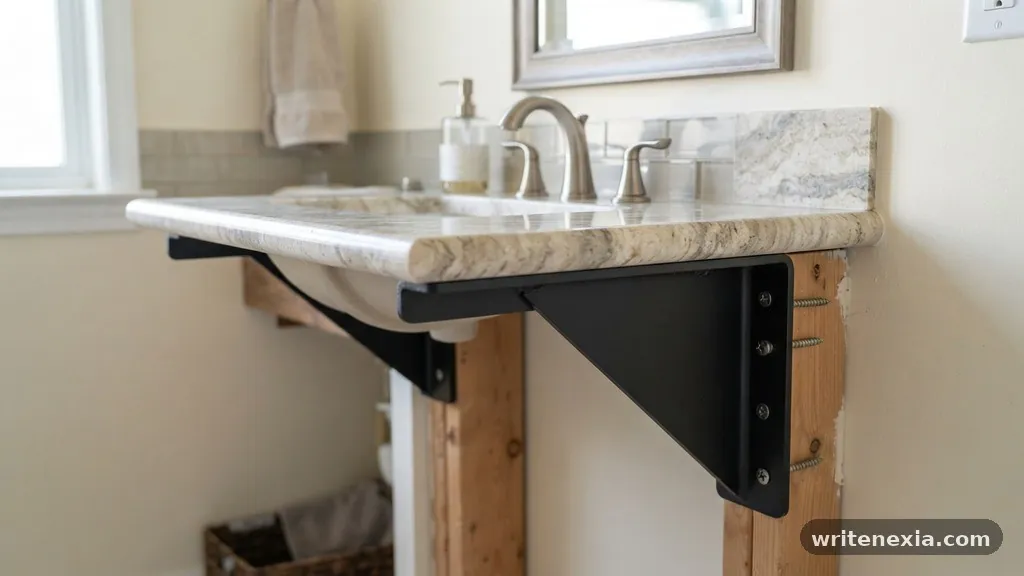
The primary purpose of selecting the best Heavy-Duty Steel Brackets for Supporting Granite Vanity Tops is to manage the immense weight of the stone. A standard 3cm thick slab of granite typically weighs between 18 and 20 pounds per square foot. If your vanity features an extended overhang or a floating design, the stress on the edge of the cabinetry or the wall studs increases exponentially. You must ensure your hardware is rated for these specific loads to prevent bowing or catastrophic failure.
Most professional-grade steel brackets are fabricated from 1/4-inch or 3/8-inch thick hot-rolled steel. These materials provide the necessary rigidity to handle the leverage applied by heavy stone slabs.
Avoid lightweight aluminum or thin gauge sheet metal, as these materials often flex under sustained pressure. A true heavy-duty bracket remains rigid, ensuring the stone does not develop hairline fractures over time.
Hidden Versus Decorative Designs
Homeowners often choose between hidden steel brackets and decorative corbels, but the structural requirements remain the same. Hidden brackets are designed to be recessed into the wall studs or cabinet frame, creating a floating effect where the granite appears unsupported. These are ideal for modern bathrooms where clean lines and a minimalist aesthetic are the primary goals. Because they lack the physical mass of a corbel, they rely entirely on the tensile strength of the steel and the quality of the mounting hardware.
Decorative corbels, conversely, provide a visual sense of support while also acting as a physical brace. These are often made from cast iron, solid wood, or steel with ornate finishes.
While they are aesthetically pleasing, you must still ensure the core material is load-bearing. A purely decorative corbel that is glued to the drywall without being anchored into a stud will not protect your granite from cracking.
Material Thickness and Steel Quality
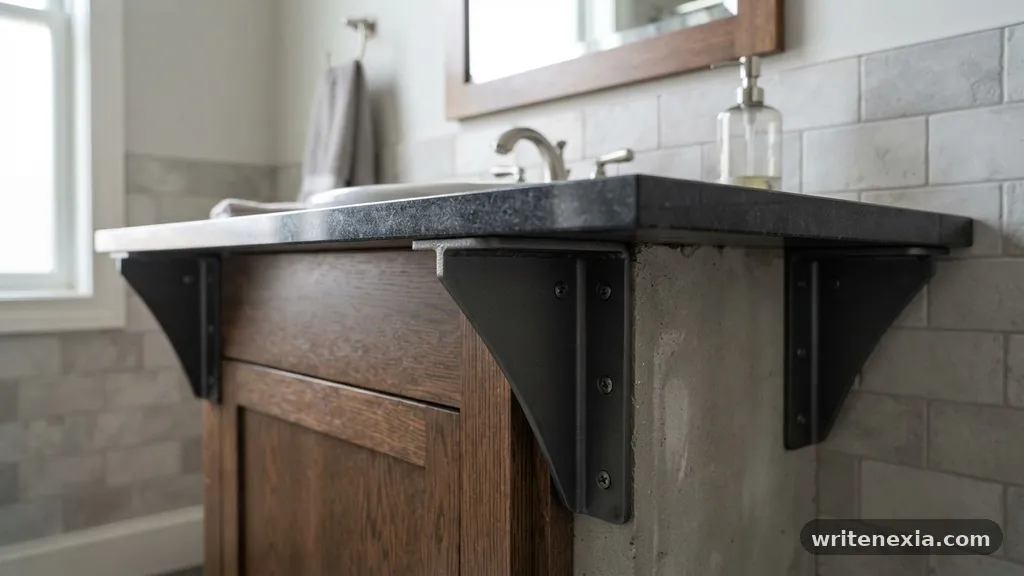
When you evaluate the best Heavy-Duty Steel Brackets for Supporting Granite Vanity Tops, the quality of the steel is just as important as the design. Look for brackets made from 1018 cold-rolled steel or similar high-carbon steel alloys. These materials are specifically chosen for their high yield strength, meaning they can support significant weight without permanently deforming. Cheap, low-grade steel may bend over time, leading to a slight sag that ruins the level surface of your vanity.
The thickness of the metal is the most reliable indicator of performance. A 1/4-inch thick bracket is usually the minimum requirement for a standard vanity depth of 22 to 24 inches.
If your granite has a large overhang exceeding 10 inches, you should upgrade to 3/8-inch or even 1/2-inch thick steel. These dimensions offer enough resistance to keep the stone perfectly flat, even if someone leans heavily against the edge of the vanity.
Correct Spacing and Layout
Proper spacing is the most overlooked factor in granite support, yet it is just as vital as the bracket quality itself. You should generally space your supports no more than 24 to 30 inches apart along the length of the vanity. If you have a long vanity, you must calculate the number of brackets based on the total span of the granite. Placing supports too far apart allows the stone to flex between the connection points, which is the most common cause of stress fractures.
You must also align your brackets with the structural members of your home, such as wall studs or custom support blocking inside the vanity cabinet. Installing a bracket into drywall alone will result in the fastener pulling out under the weight of the stone. Always use heavy-duty lag bolts or structural screws that penetrate at least 2 to 3 inches into the wooden framing behind the wall.
Installation Techniques for Stability
The installation process begins with ensuring your mounting surface is perfectly level before the granite is even placed. If the wall or the cabinet frame is uneven, the granite will sit at an angle, creating uneven pressure points on the steel brackets. Use shims to adjust the height of individual brackets until they form a perfectly level plane across the entire width of the vanity. This step is tedious but necessary to ensure the stone sits flush against every support point.
Once the brackets are level, you must secure them using the correct fasteners. Standard wood screws are rarely strong enough to handle the sheer force of a granite slab.
Use structural lag screws with a large diameter to ensure they bite deeply into the studs. If you are mounting into concrete or masonry walls, use high-quality wedge anchors or sleeve anchors to prevent the bracket from shifting.
Comparing Support Options
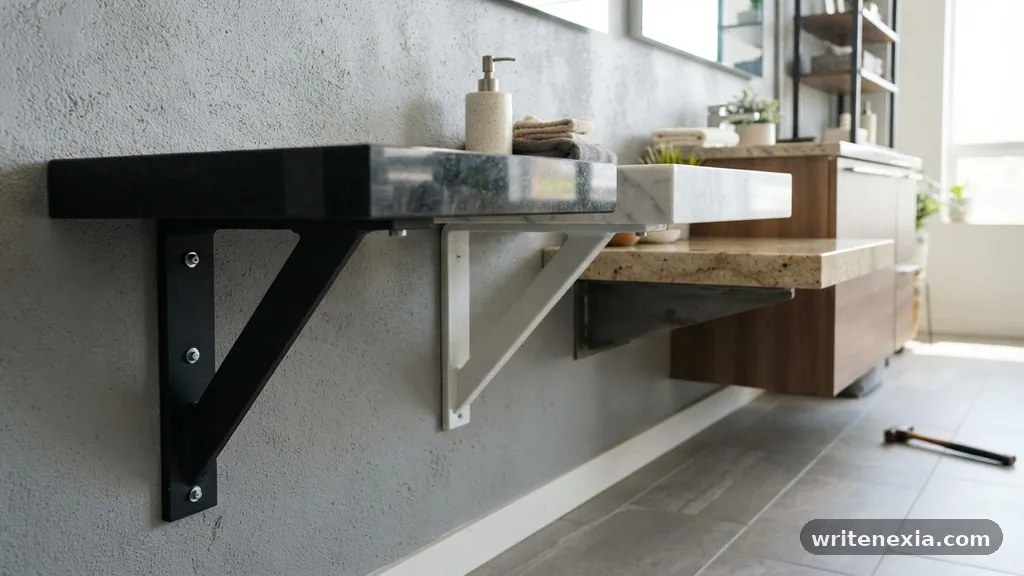
| Support Type | Material | Best Use Case | Load Capacity |
|---|---|---|---|
| Hidden Steel Plate | 1/4″ Steel | Modern floating vanities | High |
| Decorative Corbel | Cast Iron | Traditional or rustic styles | Moderate |
| L-Bracket | 3/8″ Steel | Heavy-duty wall mounting | Very High |
| Cabinet-Mounted Brace | Steel/Wood | Standard vanity tops | Moderate |
Adhesives and Finishing Touches
While steel brackets provide the structural foundation, adhesives play a role in keeping the granite from sliding or shifting. A small bead of high-quality silicone adhesive on the top surface of each bracket creates a bond between the metal and the stone. This prevents the granite from vibrating or moving slightly when items are placed on the surface. Do not use rigid epoxy to glue the stone to the brackets, as the stone needs to expand and contract slightly with temperature changes.
If your brackets are visible, such as in a floating vanity design, consider the finish of the steel. Powder coating is the industry standard for durability, as it resists moisture and prevents rust in bathroom environments.
Black or grey powder-coated finishes typically blend well with modern stone colors. If your brackets are hidden, you can choose raw or primed steel, provided you apply a rust-resistant paint to prevent oxidation over time.
Common Mistakes to Avoid
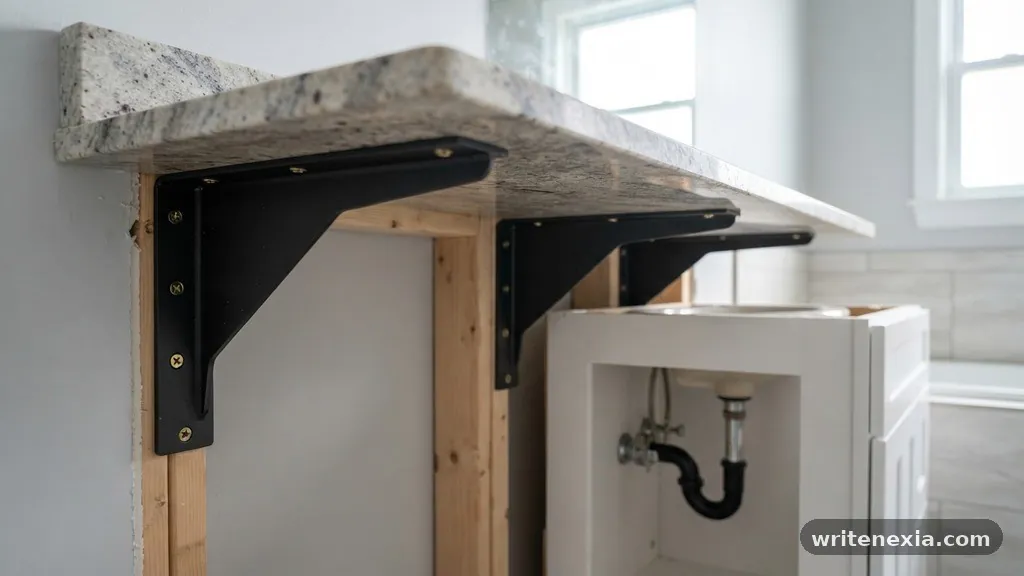
One of the most frequent errors is assuming that the vanity cabinet itself is strong enough to support an extended granite overhang. Most standard vanity cabinets are constructed from thin plywood or particle board that cannot support the weight of granite without reinforcement. If you plan to have a significant overhang, you must install internal steel plates that tie into the wall studs. Relying on the cabinet to hold the weight will eventually lead to the cabinet sides bowing or the granite cracking at the weakest point.
Another mistake is failing to account for the thickness of the granite when calculating the bracket length. A 22-inch deep vanity top requires a bracket that extends almost to the edge of the stone for maximum support.
If your bracket is too short, the outer edge of the granite remains unsupported, creating a fulcrum point that puts immense pressure on the inside edge. Always choose a bracket length that provides support within 2 to 4 inches of the front edge of the stone.
Working with Professional Fabricators
When ordering custom granite, consult with your stone fabricator about your support plan before the vanity top is cut. They have seen countless installations and can advise you on whether your chosen bracket layout is sufficient for the specific type of granite you have selected. Some granite varieties are more brittle than others, and a fabricator may recommend additional support for stone with large natural fissures. They can also help you determine the exact placement for the brackets to ensure they don’t interfere with plumbing or drawers.
If you are buying brackets online, verify the load ratings provided by the manufacturer. Reputable companies will provide technical specifications detailing the weight capacity per pair of brackets.
Do not purchase generic hardware from big-box stores that lacks specific weight ratings. When in doubt, it is always safer to over-engineer your support system by adding an extra bracket rather than risking the integrity of expensive stone.
Maintenance and Long-Term Care
Once installed, check your supports periodically to ensure the fasteners remain tight. Over time, the natural expansion and contraction of the home’s framing can cause screws to loosen slightly. A quick annual inspection allows you to tighten any bolts that have backed out, keeping the entire assembly rigid. If you notice any rust or degradation on the brackets, clean the affected area and apply a touch-up paint to maintain the seal.
Keep an eye on the seam between the stone and the wall or bracket. If you notice the silicone bead pulling away or widening, it may indicate that the vanity is shifting or that a support point has failed.
Addressing these small signs early prevents the granite from developing larger cracks that are impossible to repair invisibly. A well-installed support system should last as long as the granite itself, provided it remains properly secured and protected from moisture.
Frequently Asked Questions
Do granite vanity tops always need support brackets?
Yes, if the granite overhangs the vanity cabinet by more than 6 inches, it requires mechanical support. Granite is a natural stone that is incredibly heavy but brittle, meaning it can snap easily if the unsupported span is too long. While some small vanities seem stable, using heavy-duty steel brackets is the only way to guarantee the stone won’t crack under weight.
How much weight can a single steel support bracket hold?
The weight capacity depends entirely on the thickness of the steel and the mounting method. A high-quality 1/4-inch thick steel bracket properly anchored into a wood stud can typically support between 100 and 200 pounds of distributed weight. Always check the manufacturer’s specific load ratings, as these can vary significantly based on the length and design of the bracket.
Can I mount these brackets directly into drywall?
Never mount support brackets into drywall alone. Drywall lacks the density to hold the heavy-duty fasteners required for granite, and it will fail under the weight of the stone. You must locate the wall studs and use structural lag screws to mount the brackets directly into the house framing for a safe installation.
What is the ideal spacing between brackets?
For most granite vanity tops, you should space your supports between 24 and 30 inches apart. If your vanity is longer, add more brackets to maintain this interval, ensuring no section of the granite is left unsupported for too long. Always align these with the structural studs or internal blocking to ensure the weight is distributed properly.
Is it necessary to use adhesive with the brackets?
Using a small amount of silicone adhesive between the bracket and the granite is recommended. It creates a secure bond that prevents the granite from sliding or vibrating during daily use. However, you should avoid using rigid epoxies or heavy-duty construction adhesives that could prevent the stone from shifting naturally with house temperature changes.
Selecting the Right Hardware for Your Project
Selecting the best Heavy-Duty Steel Brackets for Supporting Granite Vanity Tops is the most effective way to protect your investment and ensure a high-quality finished result. By focusing on steel thickness, proper stud-based installation, and correct spacing, you create a foundation that will support your stone for decades. Never cut corners on the hardware, as the cost of replacing a cracked slab far exceeds the price of premium steel supports. Whether you are aiming for a floating, minimalist look or a classic aesthetic, there is a steel bracket design that fits your needs while providing the structural strength required. Start your project by identifying the load requirements of your specific granite slab, then choose brackets that exceed those specifications to give yourself peace of mind. If you need further assistance with your layout, reach out to your local granite fabricator to confirm your installation plan before you begin the work.
Leave a Reply
Dealing with a bathroom remodel often reveals hidden issues, and leveling a pre-fab vanity when the tile floor has a 1/2 inch slope is a common challenge for homeowners. A vanity that sits unevenly will not only look wrong but can also cause your countertop to crack and your cabinet doors to bind. Addressing this gap requires a methodical approach involving precise measurements, shimming, and securing the unit to the wall studs.
By properly accounting for the floor’s pitch, you ensure your vanity remains stable and functional for years. This process provides the structural integrity needed to protect your plumbing connections and your vanity finish from unnecessary stress.
The Immediate Fix: Using Shims for Stability
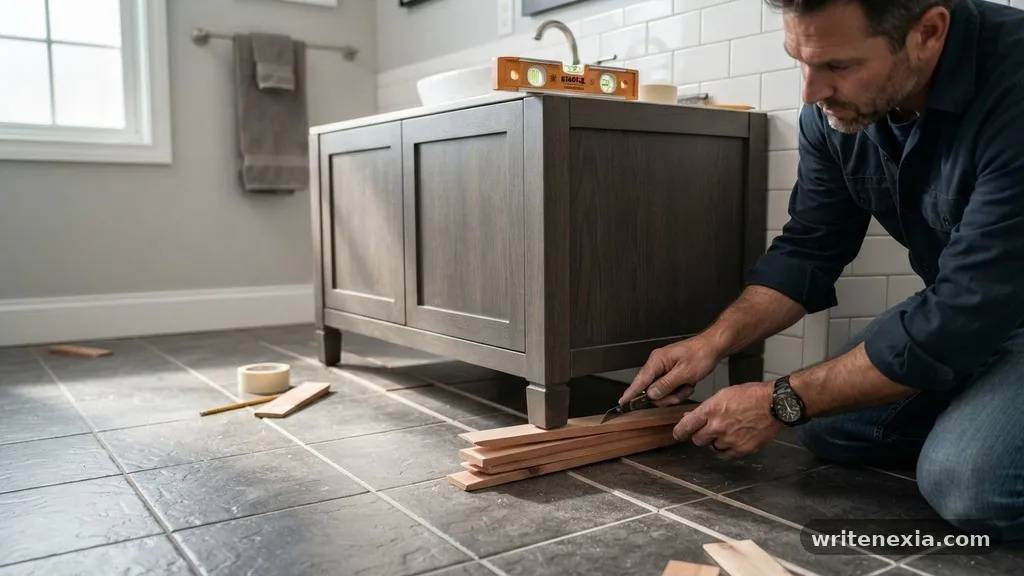
When you encounter a 1/2 inch slope, your primary tool for correction is the humble shim. You should start by placing a spirit level or laser level across the top of the vanity to determine exactly where the high and low points are. Because your floor drops by a half-inch, the side of the cabinet sitting on the lowest point will require a stack of shims to reach the level plane of the high side.
Avoid using makeshift items like cardboard or folded paper, as these compress over time and lose their structural integrity. Instead, opt for composite shims rather than traditional cedar shims in a bathroom setting.
Composite materials are impervious to the moisture that frequently accumulates around a bathroom floor. They will not rot, swell, or shrink when exposed to the humidity generated by your shower or sink.
Measuring and Marking the Slope
Before you commit to a permanent installation, you must accurately gauge the slope across the entire footprint of the vanity. Place your cabinet in its intended location and use a long level to check both the front-to-back and side-to-side orientation. If the floor is consistently sloping in one direction, mark the floor at the base of the cabinet where the gap is largest.
Use a scribe tool or a carpenter’s pencil to mark the cabinet base if you need to trim the bottom edge. However, for a 1/2 inch gap, shimming is usually the cleaner and more reversible option.
Ensure that you are measuring from the highest point of the tile floor, as this serves as your baseline. If you build up the low side without verifying the high side, you will end up with a cabinet that is level but stands too high for the plumbing rough-in.
Managing Plumbing and Rough-in Height

A significant risk when leveling a vanity is the alignment of your water supply lines and the P-trap. When you raise the vanity to accommodate a 1/2 inch slope, you effectively move the entire cabinet upward. This can cause the existing drain pipe in the wall to sit too low, preventing the P-trap from connecting properly.
Always check your shut-off valves before finalizing the vanity position. If the elevation change is significant, you might need to adjust the plumbing lines within the wall or use flexible supply lines to compensate for the shifted height.
If the P-trap alignment is off by more than a quarter-inch, it is safer to hire a plumber to relocate the drain rather than forcing the pipes. Forcing a connection creates tension that can lead to leaks behind your vanity, which often go unnoticed until significant water damage occurs.
Selecting the Right Shims for the Job
Not all shims are created equal, and the type you choose determines how long the leveling job will last. While cedar is easy to cut, it can be crushed by the weight of a heavy vanity top, especially if the cabinet is made of particleboard. Composite shims are denser and offer better load-bearing capacity for marble or granite vanity tops.
Comparison of Common Leveling Materials
| Material | Moisture Resistance | Load Capacity | Ease of Use |
|---|---|---|---|
| Composite Shims | Excellent | High | Moderate |
| Cedar Shims | Low | Medium | High |
| Plastic Wedges | High | Medium | Moderate |
When installing these, drive them in from both the front and the back of the cabinet to ensure even support. If you only shim the front, the back of the vanity may settle over time, causing the vanity top to pull away from the wall. Once the cabinet is level, use a multi-tool or an oscillating saw to trim the protruding ends of the shims flush with the cabinet base.
Securing to Wall Studs
Leveling is only the first step; securing the unit ensures it stays that way. Never rely on the weight of the vanity to hold it in place, especially if you have used significant shimming. Locate your wall studs using a stud finder and mark them clearly on the wall behind the vanity.
Use high-quality cabinet screws to anchor the vanity frame to the studs. If the vanity is a pre-fab model, it likely has a solid mounting rail at the back; if not, you may need to drill through the back panel into the studs.
Always use washers if the screw head is small to prevent it from pulling through the cabinet material. Secure the cabinet at both the top and bottom rails for maximum stability and to prevent any shifting during daily use.
Dealing with the Toe Kick Gap

Once your vanity is perfectly level, you will likely notice a visible gap between the bottom of the vanity and the tile floor. This is an aesthetic issue rather than a structural one, but it can look unprofessional if left unaddressed. You can cover this gap by installing a piece of matching toe-kick molding or quarter-round trim.
If the gap is uneven, you may need to scribe the molding to match the contour of your tile. Use a piece of wood as a spacer to trace the floor’s profile onto the back of the molding.
Cut along this line with a coping saw or a jigsaw to ensure a tight, custom fit. Secure the molding with a small amount of construction adhesive or finish nails, but avoid nailing into the vanity base if it contains plumbing lines.
The Importance of a Moisture Barrier
Bathrooms are high-moisture environments, and the base of your vanity is particularly vulnerable to water splashes. When you shim a vanity, you create an open space between the cabinet and the floor that can trap water. To prevent mold and rot, apply a bead of silicone caulk along the front edge of the vanity where it meets the floor.
This sealant acts as a moisture barrier, preventing water from seeping under the cabinet and damaging the subfloor or the shims. Do not seal the back of the vanity against the wall, as you want any accidental leaks to be visible rather than trapped inside the wall cavity. A clean, thin line of silicone around the base provides a finished look and adds a layer of protection against daily cleaning routines.
Checking for Plumb and Square
Leveling is about the horizontal plane, but you must also ensure your vanity is plumb—perfectly vertical. If the vanity is not plumb, your cabinet doors will not hang correctly and may swing open or closed on their own. Use your level vertically against the side panels of the vanity to verify that the unit is not leaning forward or backward.
If the vanity is out of plumb, you may need to adjust your shims or add a secondary set of shims behind the top or bottom of the cabinet. A cabinet that is both level and plumb will ensure the doors operate smoothly and the drawers do not slide out unexpectedly. This attention to detail prevents the “racking” of the cabinet frame, which can cause the finish to crack at the joints over time.
When to Consider a Mortar Bed
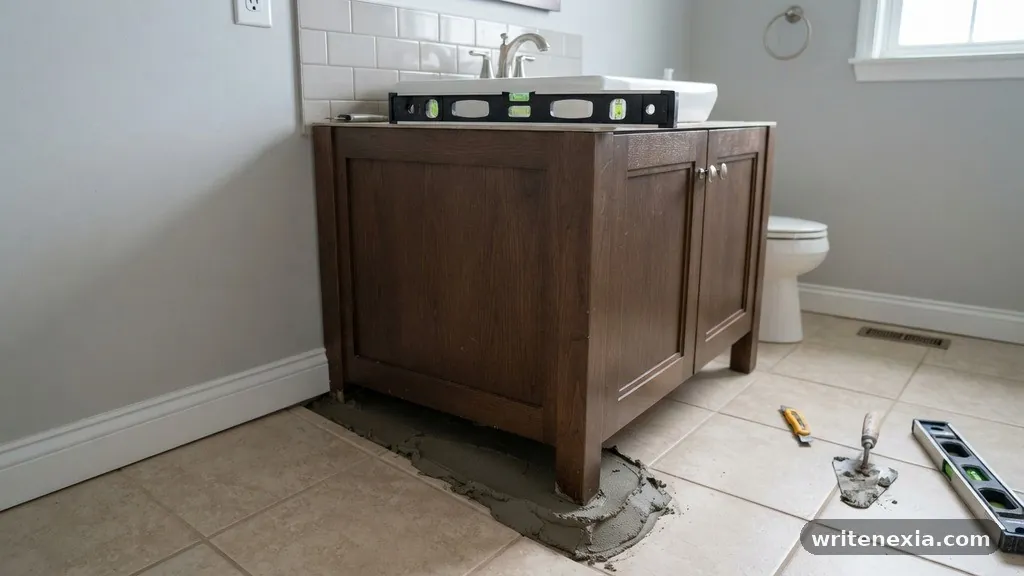
If the slope of your floor is severe—exceeding a full inch—shimming might become unstable or visually unappealing. In these cases, creating a level mortar bed is a more professional approach. You can build a small, level platform using a thin layer of quick-setting mortar or a leveling compound.
After the compound cures, you have a solid, flat surface to place your vanity on. This eliminates the need for extensive shimming and provides the most stable foundation possible for heavy stone countertops.
This method is more labor-intensive and requires waiting for the material to dry, but it is the most reliable way to handle significant floor irregularities. Always ensure the subfloor is clean and primed before applying any leveling compound to ensure proper adhesion.
Common Mistakes to Avoid
Many DIYers make the mistake of assuming the vanity is square out of the box. Always test the vanity frame before you begin, as pre-fab units can sometimes be slightly twisted from shipping. Another common error is failing to check the floor transition between the bathroom and the hallway.
If your vanity is too high, it might block the door swing or create a tripping hazard near the doorway. Always verify the overall height of the vanity top relative to the surrounding fixtures before you lock it in place.
Lastly, avoid using standard wood glue for shims; it is not designed for the high-moisture conditions found in bathrooms. Use construction-grade adhesives or leave the shims mechanical-only so they can be adjusted if the house settles.
FAQ: Troubleshooting Vanity Leveling
Do I really need to use a level for a small vanity?
Yes, even a small vanity requires a level surface. If the vanity is off-level, the weight of the countertop will distribute unevenly, which can lead to stress fractures in the vanity top or cause the cabinet frame to warp over time.
Can I just use grout to fill the gap under the vanity?
You should avoid using grout to fill the gap under a vanity. Grout is brittle and will crack as the floor and cabinet expand and contract with humidity changes. Use a flexible trim piece or silicone caulk instead.
What if my wall studs don’t line up with the vanity?
If the pre-drilled holes in your vanity do not align with your wall studs, do not try to use hollow wall anchors. Instead, drill new holes in the back rail of the vanity that align with the studs. If that is not possible, install a piece of blocking or a mounting cleat to the wall first.
How do I know if the floor is the problem or the vanity?
Use a long level to check the floor across the entire width of the vanity area. If the bubble is centered on the floor but off on the vanity, your vanity frame may be twisted. If the bubble is off on the floor, the substrate is the issue.
Is it okay to leave the vanity unattached if it’s level?
No, you must always secure the vanity to the wall. The weight of the plumbing fixtures and the vanity top can cause the unit to tip forward if it is not properly anchored to the wall studs.
Next Steps for Your Project
Successfully leveling a pre-fab vanity when the tile floor has a 1/2 inch slope is a rewarding project that significantly improves the longevity of your bathroom installation. By prioritizing structural stability with composite shims and ensuring a moisture-resistant finish, you protect your investment from future damage. Always double-check your plumbing connections and wall stud alignment before applying the final bead of silicone caulk.
If you find the slope is too severe for simple shimming, do not hesitate to use a leveling compound to create a solid base. Taking these extra steps ensures your vanity looks professional and remains functional for many years to come. If you have questions about specific product materials or need assistance with your plumbing layout, feel free to reach out for further guidance on your renovation.
Leave a Reply
Deciding whether you should caulk or grout the seam between vanity top and tile is a common dilemma for homeowners finishing a bathroom renovation. While both materials serve to seal gaps, they possess fundamentally different physical properties that dictate their performance in wet environments.
Choosing the wrong one often leads to cracked lines, unsightly water damage, or mold growth within just a few months. This article provides the definitive answer to your installation questions, helping you ensure your bathroom remains both functional and visually appealing for years to come.
The Definitive Answer: Always Choose Caulk
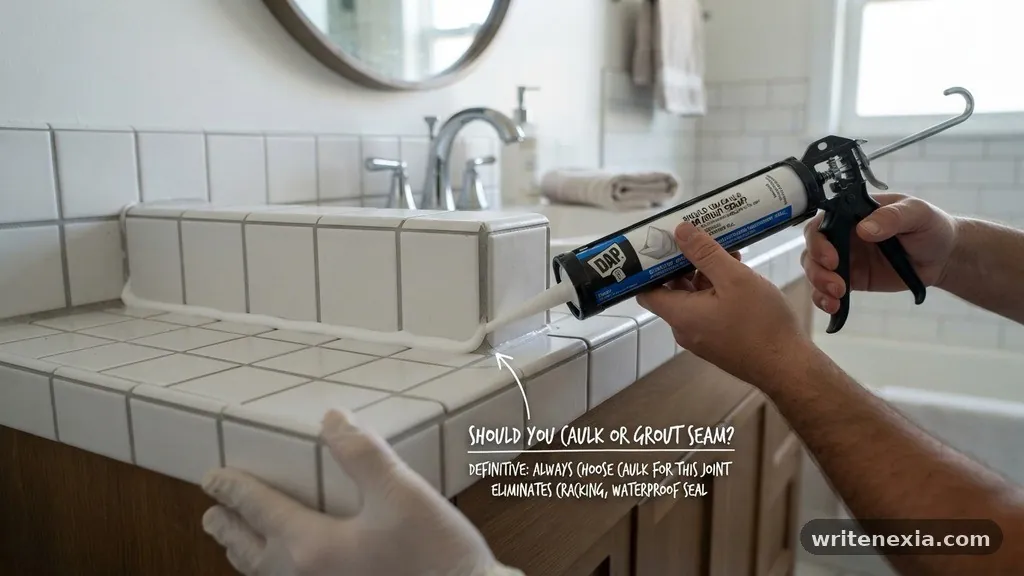
When you consider whether you should caulk or grout the seam between vanity top and tile, the answer is unequivocally to use caulk. Grout is a rigid, cement-based product designed to fill the spaces between tiles where there is minimal movement. Because a vanity top and a tiled wall are two separate structural elements that expand and contract at different rates, they create a “change of plane.”
If you use grout in this corner, the natural shifting of your home will cause the grout to crack almost immediately. Once the grout cracks, water seeps behind the vanity, leading to rot and mold. Silicone caulk, by contrast, remains flexible and absorbs the movement of the building without breaking the seal.
Understanding the Mechanics of Movement
Buildings are not static structures; they settle, shift, and vibrate due to temperature fluctuations and structural weight. When a heavy vanity top meets a wall, these two surfaces move independently of each other throughout the seasons. Grout has zero elasticity, meaning it acts as a brittle bridge between two moving objects.
When the vanity settles even a fraction of an inch, the grout line snaps, leaving an open path for moisture. This is why professional installers emphasize that any change of plane—where a horizontal surface meets a vertical one—must be sealed with a flexible sealant rather than a rigid grout.
The Role of Silicone in Moisture Control
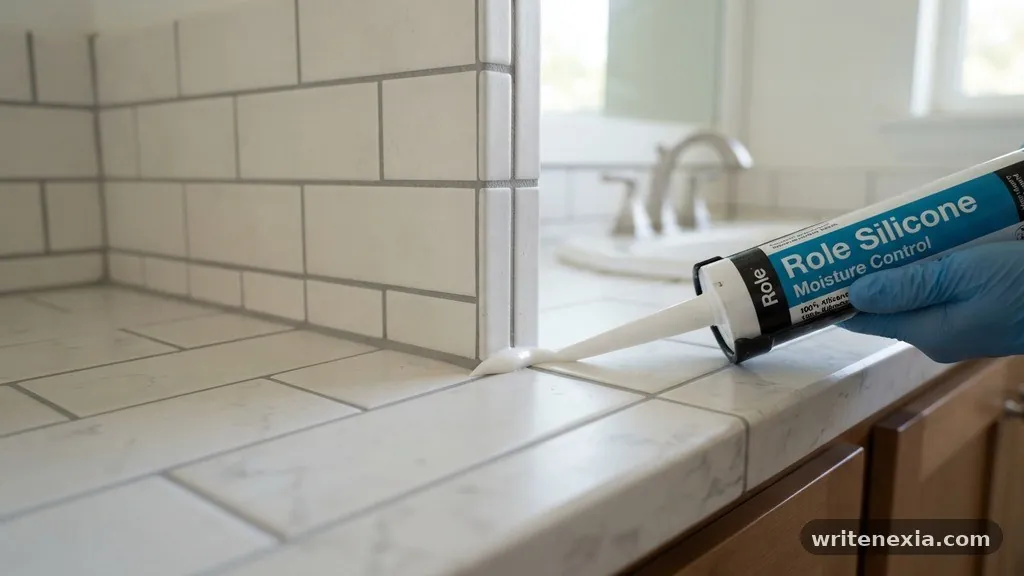
Silicone is the industry standard for sealing joints in bathrooms because it is inherently hydrophobic. Unlike sanded grout, which is porous and can absorb water if not perfectly sealed, high-quality 100% silicone creates an impenetrable barrier. It is specifically formulated to withstand the high humidity found in bathrooms, especially near sinks or showers.
By using silicone, you prevent water from migrating into the drywall or the wooden vanity cabinet. This simple choice saves you from the expensive, long-term headaches associated with water-damaged cabinetry and subfloors.
Comparing Sealing Materials
To understand the difference in performance, it is helpful to look at how these materials function under stress. The table below outlines the primary differences between using caulk versus grout in a corner joint.
| Feature | Silicone Caulk | Sanded/Unsanded Grout |
|---|---|---|
| Flexibility | High (stretches with movement) | None (rigid/brittle) |
| Waterproofing | Excellent (waterproof) | Poor (porous) |
| Application | Bead application | Trowel/Float application |
| Longevity in Corners | High (if installed correctly) | Low (cracks easily) |
Why Grout Fails in Corners
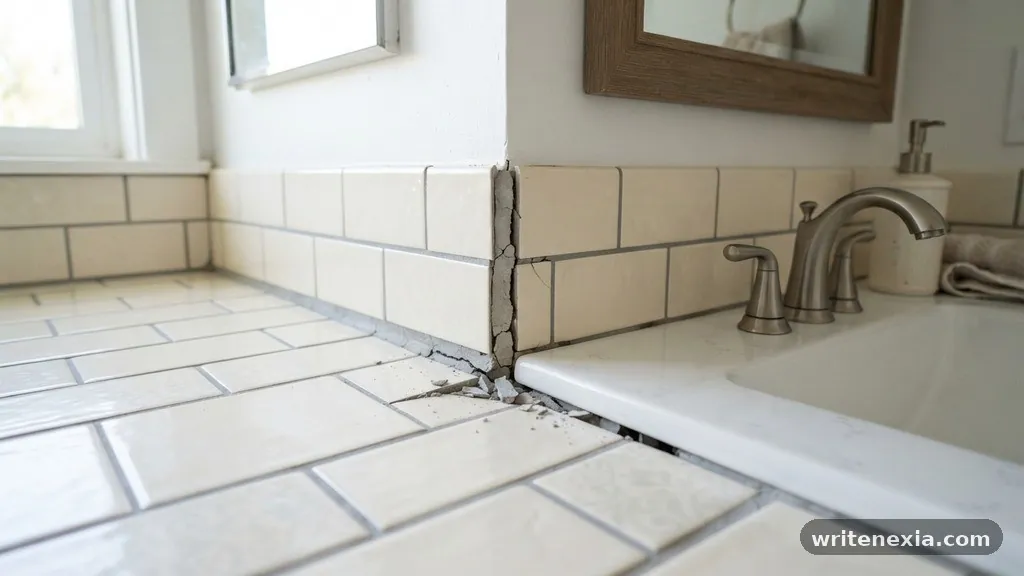
Many homeowners mistakenly use grout in corners because they want the color to match the rest of the wall perfectly. While aesthetic uniformity is a valid design goal, it should never take precedence over structural integrity. Grout is designed for the flat, stable joints between tiles on a wall or floor.
When forced into a corner, it is subjected to shear forces that it cannot withstand. Even if you use a color-matched “grout caulk” (a flexible sealant designed to mimic the appearance of grout), the underlying material must be elastomeric to prevent failure.
Benefits of Using Silicone Caulk
* Flexibility: Accommodates the natural expansion and contraction of your home.
* Mold Resistance: Most modern bathroom silicones contain biocides that inhibit mold and mildew growth.
* Waterproof Barrier: Keeps water from reaching the substrate, protecting your wall studs and vanity backing.
* Ease of Maintenance: Silicone is easy to clean and can be replaced if it eventually degrades or peels.
* Adhesion: Bonds well to both stone/quartz vanity tops and ceramic/porcelain wall tiles.
Surface Preparation Before Application
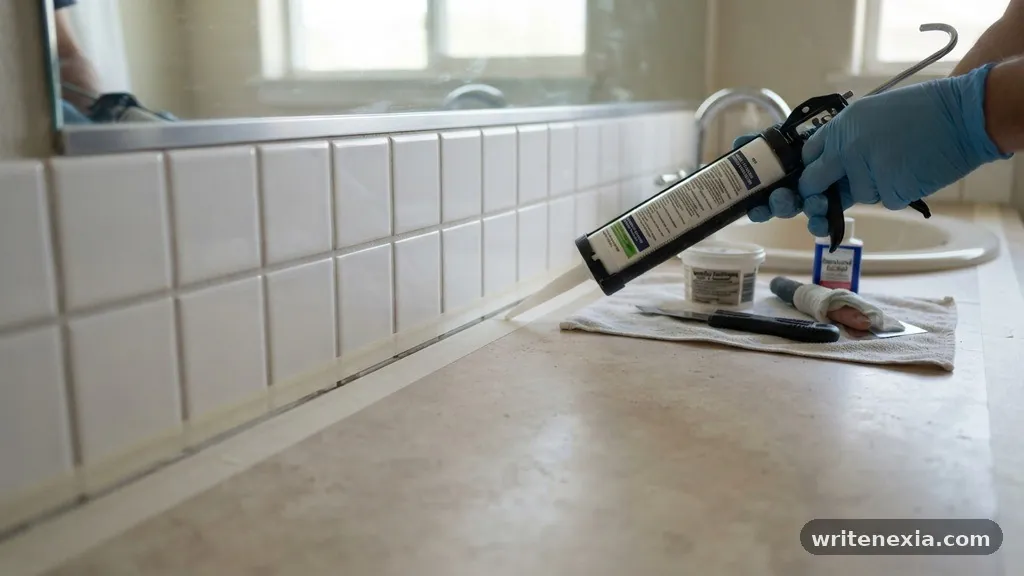
Whether you are applying caulk to a brand-new vanity or replacing old grout, preparation is the most critical step. You must remove all traces of old, failing grout or existing caulk using a utility knife or a specialized removal tool. The seam must be completely dry and free of soap scum, dust, or grease before you apply the new sealant.
If the surface is damp, the silicone will not adhere properly, and you will find it peeling away within weeks. Use rubbing alcohol to wipe down the joint and ensure a pristine, sterile surface for the best bond.
Tips for a Professional Finish
Applying caulk can be messy if you don’t have the right technique. To get a clean, professional look, use painter’s tape on both the vanity top and the wall to define the exact width of the bead.
Apply a smooth, consistent bead of silicone, then use a caulk finishing tool or a gloved finger dipped in soapy water to smooth it out. Removing the tape immediately after smoothing prevents the silicone from skinning over and dragging, which ensures that perfect, concave finish that prevents water from pooling in the corner.
Addressing Existing Cracked Grout
If you currently have grout in the seam between your vanity and tile and it is already cracking, you need to address it immediately. Do not try to simply apply more grout over the top, as it will just crack again. You must carefully dig out all the old, loose grout using a manual grout saw or a rotary tool with a grout-removal bit.
Once the gap is cleared and cleaned, fill it with a high-quality, color-matched silicone caulk. This process restores the waterproof seal and stops any moisture damage from progressing further into your wall cavity.
Choosing the Right Product
Not all silicones are created equal, and choosing the wrong type can lead to staining or poor performance. Look for “100% silicone” rather than “siliconized acrylic” or “latex caulk” for bathroom applications. While latex-based caulks are paintable and easier to clean up, they are not as durable or waterproof as pure silicone.
If you are worried about the appearance, many manufacturers offer color-matched silicone that precisely matches the grout color used elsewhere in the room. This gives you the aesthetic benefits of grout with the physical performance of silicone.
Frequently Asked Questions
Can I put caulk over existing grout?
No, you should never apply caulk directly over old grout. The grout is likely cracked or loose, and it does not provide a stable surface for the caulk to bond to. You must remove the old material first to ensure a long-lasting, waterproof seal.
Does color-matched caulk really exist?
Yes, many major grout manufacturers produce a silicone sealant that matches their standard grout color palette exactly. You can usually find these at professional tile supply stores or high-end home improvement centers.
How often should I replace the caulk in my bathroom?
In a well-ventilated bathroom, high-quality silicone caulk can last for 5 to 10 years. You should inspect it annually for signs of peeling, yellowing, or mold growth, which indicate it is time for a refresh.
Is it okay to use grout if the vanity and wall are the same material?
Even if the vanity and wall are made of the same stone or tile, they are still two separate surfaces that move independently. You should always use flexible caulk at the change of plane to avoid cracking.
What if the gap is too wide for caulk?
If the gap is exceptionally wide, you should use a foam backer rod before applying the caulk. This fills the void and provides a foundation, preventing the caulk from sagging or sinking into the deep crevice.
Long-term Maintenance and Care
Once you have successfully applied your silicone caulk, maintaining it is straightforward. Keep the area clean by wiping it down regularly to remove soap residue and water droplets, which are the primary food sources for mold.
If you see tiny black spots appearing on the surface, wipe them away immediately with a mild cleaner; if the mold has penetrated the silicone, you may need to cut it out and replace that section. By keeping the area dry and clean, you significantly extend the life of the sealant and keep your bathroom looking fresh.
Final Thoughts on Installation
The decision to use flexible sealant over rigid grout is one of the most important steps in bathroom construction. While it might be tempting to use the same grout you used for your wall tiles, the physical reality of building movement makes this a mistake that will eventually lead to repairs. By using the right 100% silicone product and taking the time to prepare the joint correctly, you ensure your vanity area remains dry and protected.
If you are currently dealing with cracks in your bathroom, take the time to remove that old grout and replace it with a flexible, color-matched silicone today. This simple maintenance task is the best way to safeguard your home against moisture damage and keep your bathroom looking its best for years to come.
Leave a Reply
Mastering the process of scribing a vanity countertop to fit out-of-square alcove drywall is the difference between a amateur-looking gap and a professional, built-in appearance. Many homeowners assume walls are perfectly plumb, but older homes and even new builds often feature subtle curves or tilts that make installing a flat slab difficult.
By learning how to transfer the exact contour of your wall onto your countertop material, you ensure a tight, custom fit that requires minimal caulking. This article provides the practical techniques needed to achieve a clean result when you are dealing with irregular surfaces, helping you avoid common mistakes during your bathroom renovation.
The Core Technique for Scribing

The fundamental concept behind this process is using a compass to trace the exact profile of the wall onto the countertop. You start by pushing the countertop as far into the alcove as possible, noting where it hits the wall first.
By keeping your compass set to the widest gap between the stone or wood edge and the drywall, you can physically map the wall’s imperfections onto the material. This line represents exactly where you need to remove excess material to achieve a perfect match.
When you prepare to scribe, ensure the countertop is level and properly supported before you begin marking. If the top moves while you are tracing, your line will be inaccurate, leading to a gap that is impossible to fix without starting over.
Use a high-quality carpenter’s pencil or a fine-tip scribe tool to ensure the line is precise. Once marked, you will use specific power tools to remove the waste material up to that line, effectively contouring the edge to the wall’s unique shape.
Essential Tools for Precision Cutting
You cannot achieve a professional finish without the right equipment for removing material. For stone or quartz vanity tops, a variable-speed angle grinder equipped with a diamond blade is the standard tool of choice.
If you are working with wood or laminate, a jigsaw with a fine-tooth blade or a belt sander works best for removing larger amounts of material. Having a set of files or a sanding block on hand is also vital for the final refinement stage.
| Material Type | Primary Cutting Tool | Refining Tool |
|---|---|---|
| Natural Stone/Quartz | Diamond Blade Grinder | Diamond Hand Pad |
| Solid Wood/Butcher Block | Jigsaw | Belt Sander |
| Laminate/Particle Board | Fine-tooth Jigsaw | Orbital Sander |
| Engineered Surface | Oscillating Multi-tool | File/Rasp |
Each tool requires a different level of control and caution. For instance, a diamond blade can easily chip stone if you move too quickly, so take your time and use light pressure.
A belt sander is highly aggressive, meaning you should stop just short of your line and finish the last sixteenth of an inch by hand. Using the right tool for the job significantly reduces the risk of damaging the expensive countertop surface.
Measuring and Marking the Profile

Before you cut, you must confirm the countertop is square relative to the front of the vanity cabinet. Use a framing square to check the front edge of the vanity against the side walls of the alcove.
If the walls are significantly out of square, you might need to adjust the vanity cabinet position first. Marking the wall profile requires a steady hand and a clear view of the gap at every point along the back edge.
When using the compass, keep it perfectly perpendicular to the wall surface at all times. If you tilt the compass, you change the effective distance, which ruins the accuracy of the line you are creating.
It is often helpful to have a second person hold the countertop firmly in place while you mark the entire length. If you are working alone, use wood shims or clamps to lock the piece into position before you start the marking process.
Removing Material Safely
Once you have your line marked, the material removal phase begins. For heavy stone tops, you should ideally move the piece to a stable workbench where you can control the angle of your grinder.
If the piece is too heavy to move, you will need to perform the work in place, which requires careful dust management. Use a shop vacuum with a HEPA filter to catch debris immediately as you grind or sand.
Always cut slightly to the “waste” side of your pencil line. You can always remove more material, but you cannot add it back if you cut too deep.
Start with a coarse grit or blade to remove the bulk of the material, then switch to a finer grit to approach the final line. Check the fit against the wall frequently during this process to avoid over-shooting your mark.
Refining the Edge Fit

The final fit is achieved through slow, deliberate refinement of the edge. After your initial cuts, place the countertop back into the alcove to see where it still makes contact with the wall.
If you notice a high spot that prevents the top from sliding all the way back, mark that area with a pencil. Remove the piece, sand that specific spot down, and test the fit again.
This iterative process of “cut, test, adjust” is the hallmark of professional craftsmanship. Do not try to achieve the perfect fit in a single pass, as this usually leads to mistakes.
Instead, accept that you will need to perform three or four small adjustments to get the edge tight against the drywall. This patience ensures that your final installation looks like it was custom-made for the space.
Handling Out-of-Square Walls
Walls are rarely perfectly vertical, and this is where many DIY projects encounter trouble. If your wall leans inward or outward, your countertop edge will not just be curved; it will be beveled.
You must account for this by angling your grinder or sander to match the slope of the wall. Failing to bevel the edge will result in a gap at either the top or the bottom of the countertop edge.
Check the wall angle using a level or an angle gauge before you start cutting. If the wall is out of plumb by an eighth of an inch over the height of the backsplash, you must angle your tool accordingly.
This level of detail makes the difference between a visible gap and a seamless, professional installation. Taking the time to observe the wall’s geometry saves you from having to use excessive amounts of caulk later.
Managing Dust and Debris

Cutting stone or composite materials creates a significant amount of fine dust that can permeate your home. Always use a wet-cutting method if your equipment allows, as water suppresses dust and keeps the blade cool.
If you must cut dry, ensure you are wearing a high-quality respirator and using a dust shroud on your grinder. Protecting your lungs and keeping the work area clean are non-negotiable parts of the job.
Consider setting up a temporary plastic partition if you are working inside a finished bathroom. This prevents dust from settling on fixtures, towels, and other surfaces that are difficult to clean.
If you are working with wood, the dust is easier to manage, but it can still be a nuisance. Clear your workspace periodically to maintain a safe environment where you can see your lines clearly.
Final Installation Steps
After you have achieved a satisfactory fit, clean the back edge and the wall thoroughly to remove any grit or dust. Apply a thin bead of high-quality silicone sealant along the wall to provide a flexible, waterproof barrier.
If your fit is truly tight, you may only need a very small amount of caulk, which looks much cleaner than a thick, messy bead. Press the countertop into place and check that it is level from front to back and left to right.
Secure the top to the vanity cabinet according to the manufacturer’s instructions. Most stone tops are secured with small dabs of silicone at the corners rather than mechanical fasteners.
Once the sealant cures, the countertop will be firmly in place and ready for sink and faucet installation. Verify the plumbing connections one last time before you fully commit to the final seal.
- Use a high-quality compass for marking the wall profile.
- Always cut on the waste side of your line to allow for refinement.
- Verify the angle of the wall to ensure your cut is beveled correctly.
- Work in small, iterative steps to avoid over-cutting the material.
- Use a shop vacuum or wet-cutting method to manage dust effectively.
- Apply a thin, consistent bead of silicone for the final moisture seal.
Common Challenges During the Process
One of the most common issues is underestimating how much material needs to be removed. If you find yourself struggling to get the top to move, don’t force it, as you could crack the vanity cabinet or the stone itself.
Take the piece out and re-evaluate where the binding is occurring. Often, a single small protrusion in the drywall is the culprit, and removing that one spot solves the entire problem.
Another challenge involves dealing with decorative trim or baseboards that interfere with the countertop. You may need to notch the countertop to accommodate these features or remove the trim and reinstall it after the countertop is set.
Plan for these obstacles before you start cutting. Having a clear plan for every edge of the countertop ensures you don’t encounter unexpected delays during the final assembly.
FAQ Section
How do I know if my wall is out of square?
You can check for square by placing a long straight-edge or level against the wall and measuring the distance to a reference point, such as the front edge of your vanity. If the distance changes as you move along the wall, the wall is either bowed or out of plumb. A framing square placed in the corner where the wall meets the vanity will also quickly reveal if the angle is not a perfect 90 degrees.
Can I use caulk to fill a large gap?
While caulk is designed to seal joints, it is not meant to fill large structural gaps. A gap wider than a quarter-inch will look unprofessional and is prone to cracking as the house settles. It is far better to scribe the countertop to ensure a tight fit and then use a minimal amount of color-matched silicone caulk for a clean, finished appearance.
What if I accidentally cut too much material off?
If you cut too deep, you have a few options depending on the material. For wood, you can glue on a small filler strip, sand it flush, and refinish the edge. For stone or quartz, you may need to shift the entire countertop over to hide the gap on one side, or in extreme cases, use a specialized stone epoxy that matches the color of your countertop to fill the void.
Is it better to cut the drywall or the countertop?
It is almost always better to scribe the countertop rather than cutting into the drywall. Cutting the drywall can damage the structural integrity of the wall, expose studs, and create a much larger mess that requires patching, taping, and painting. Scribing the countertop is a cleaner, more controlled process that leaves the wall finish intact.
How long should I expect this to take?
For a standard vanity alcove, expect to spend anywhere from two to four hours on the scribing and fitting process. If the walls are severely out of square or if you are working with a difficult material like dense granite, it may take longer. Rushing the process is the primary cause of errors, so budget extra time to ensure you get the fit right the first time.
Conclusion
Achieving a precise fit when scribing a vanity countertop to fit out-of-square alcove drywall requires patience, the right tools, and an attention to detail that sets your work apart. By mapping the wall’s unique contours and removing material in small, calculated stages, you transform a potentially frustrating installation into a rewarding project. Remember that every wall has its own character, and taking the time to match that character ensures a lasting, high-quality result.
If you find yourself stuck, step back and re-measure your reference points before making another cut. Consistent progress and careful tool management will help you reach that professional finish you are aiming for.
When you are ready to start, take your time, keep your workspace clean, and enjoy the satisfaction of a job done correctly. Your efforts will result in a beautiful bathroom space that stands the test of time.
Leave a Reply
When you are installing a new cabinet, you often find that the wall is not perfectly square. Dealing with filling Large Gaps Between Uneven Bathroom Walls and Vanity Top is a common frustration for DIY renovators and contractors alike. You might notice a wedge-shaped opening that starts at nothing near the floor and grows to an inch or more at the top.
Leaving this void exposed invites water damage and creates an eyesore where hair and debris collect. Choosing the right method depends on the size of the opening and your desired aesthetic. This article provides practical solutions to bridge these spaces effectively while maintaining a professional finish in your bathroom.
Assess the Size of the Gap

Before you commit to a specific repair method, you must measure the distance between your countertop and the wall at its widest point. Standard silicone caulk is designed to bridge gaps no larger than 1/4 inch. If your opening exceeds this, the sealant will likely sag, crack, or fail to bond properly over time.
A gap between 1/4 inch and 1/2 inch often requires a backer rod to provide a stable foundation for the sealant. Anything wider than 1/2 inch usually demands a physical piece of material, such as a filler strip or molding, to bridge the divide successfully.
Taking accurate measurements ensures you do not waste time on a solution that will not last. Use a tape measure to check the distance at the top, middle, and bottom of the vanity edge. Because walls are rarely perfectly plumb, the gap might vary significantly along the height of the cabinet.
Mark the widest section with a pencil so you know exactly how much material you need to cover. If the wall is severely bowed, you might need to scribe your filler strip to match the wall’s unique contour.
Using Backer Rod for Medium Gaps
A backer rod is a flexible, cylindrical piece of foam that acts as a gap filler for medium-sized openings. It prevents the caulk from sinking into the void, allowing you to create a clean, professional bead. You can find these in various diameters at most hardware stores.
Choose a rod that is slightly larger than the gap so that it stays firmly in place once inserted. Press the rod into the space using a putty knife, ensuring it sits about 1/8 inch below the surface of the countertop.
Once the backer rod is securely in place, you can apply your silicone sealant over it. The rod provides a solid backing that allows the caulk to bridge the gap without sagging into the wall cavity. This technique creates a waterproof seal that prevents moisture from leaking behind the vanity cabinet.
It is an ideal method for gaps that are too large for caulk alone but too small to justify installing heavy wood trim. Make sure the area is completely dry and free of dust before you begin the application process.
Installing Custom Filler Strips
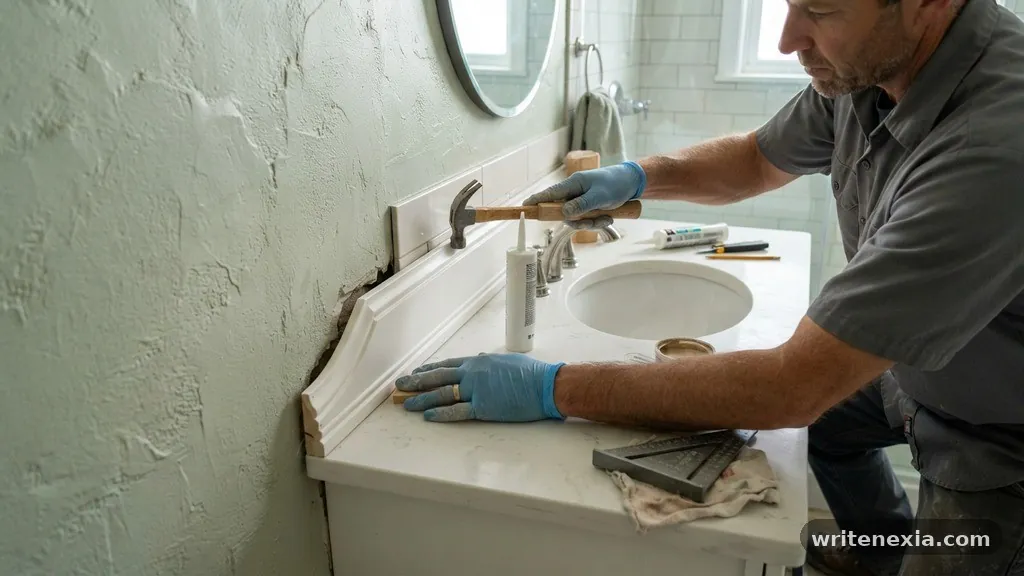
When the distance between the cabinet and the wall is substantial, a custom filler strip is often the most durable solution. These are typically thin pieces of wood or PVC that match the finish of your vanity or the surrounding wall.
You cut the strip to the required length and width, then attach it to the side of the cabinet before the vanity is finalized. This effectively extends the cabinet profile to meet the wall, hiding the structural irregularity of the room.
To install a filler strip, you must first measure the widest part of the gap. Rip your piece of wood or PVC to that width, then scribe it to the wall if the surface is wavy or uneven. You can secure the strip to the cabinet frame using wood glue and finish nails or pocket screws from the inside of the cabinet.
Once attached, use a bead of white or color-matched caulk to seal the seam between the filler strip and the wall. This creates a finished look that appears as if the vanity was custom-built for that specific space.
Applying Decorative Molding
Decorative molding is an excellent way to mask a gap while adding a touch of style to your bathroom. You can choose from various profiles, such as quarter-round, cove, or flat baseboard trim, depending on your design preference.
For a bathroom setting, it is vital to use moisture-resistant materials like PVC or primed composite wood. Avoid raw pine or MDF, as these will swell and rot when exposed to the high humidity typical of a shower area.
Measure the length of your vanity side and cut the molding to fit precisely. You can attach the molding to the cabinet edge using a high-quality construction adhesive or small brad nails. If you are using nails, ensure you countersink the heads and fill them with wood putty before painting.
Once the molding is attached, apply a thin bead of silicone sealant along the joint where it meets the wall. This prevents water from seeping behind the trim and causing long-term damage to the wall substrate.
Choosing the Right Sealant
Not all sealants are created equal, and choosing the right one is critical for a bathroom environment. You should always opt for 100% silicone sealant rather than acrylic latex caulk. Silicone is inherently waterproof, flexible, and resistant to mold and mildew growth.
While it is more difficult to clean up than water-based products, its performance in high-moisture areas is unmatched. Look for products labeled specifically for kitchen and bath use to ensure they contain biocides that inhibit fungal growth.
When applying the sealant, use painter’s tape on both the wall and the vanity top to ensure a crisp line. Apply a steady, even bead of silicone into the gap, moving the caulk gun at a consistent speed. Use a specialized caulk smoothing tool or a gloved finger dipped in soapy water to profile the bead.
Remove the painter’s tape immediately after smoothing while the sealant is still wet. This prevents the skin of the caulk from tearing as you pull the tape away, leaving you with a clean, professional edge.
Comparing Common Gap Solutions
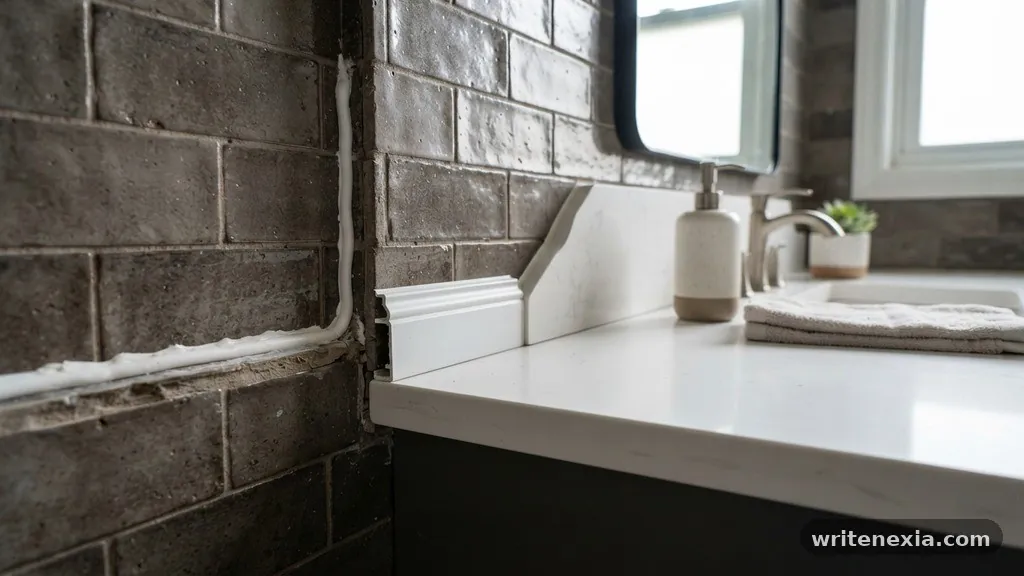
Different situations call for different materials. The following table provides a quick reference to help you decide which method fits your specific gap size.
| Gap Size | Recommended Solution | Difficulty Level |
|---|---|---|
| Under 1/8 inch | Silicone sealant alone | Easy |
| 1/8 to 1/4 inch | Backer rod + silicone | Moderate |
| 1/4 to 1 inch | PVC or wood filler strip | Intermediate |
| Over 1 inch | Custom trim or cabinet extension | Professional |
Preparing the Surface for Adhesion
Proper surface preparation is the most important factor in the longevity of your repair. If the wall is covered in latex paint, ensure it is clean and dry. Use a degreaser or rubbing alcohol to wipe down the area where the caulk or adhesive will sit.
Any residual soap scum, dust, or oils will prevent the sealant from creating a permanent bond. If you are applying a filler strip, sand the cabinet side lightly to help the construction adhesive grip the surface.
If there is old, moldy caulk present, you must remove it entirely before starting. Use a sharp utility knife or a dedicated caulk removal tool to scrape away the old material. Do not try to apply new sealant over old, failing layers, as the new product will simply peel away.
Once the surface is clean, allow it to dry for several hours before applying any new materials. If you are working in a humid climate, use a hair dryer to ensure the wall substrate is bone dry.
Common Mistakes to Avoid
Many DIYers make the mistake of using too much caulk to fill a large hole. This leads to a messy, bulbous appearance that is difficult to smooth and prone to collecting grime. If the gap is wider than a pencil, do not attempt to fill it only with sealant.
You will end up with a sagging, unsightly mess that eventually cracks as the building settles. Always use a physical bridge like a backer rod or trim piece for anything wider than a quarter-inch.
Another frequent error is failing to allow enough time for the sealant to cure. While many products feel dry to the touch within an hour, they often require 24 hours to cure completely. Exposing the area to water or steam too soon can compromise the integrity of the seal.
Always check the manufacturer’s label for specific drying times. Finally, avoid using silicone on surfaces that you intend to paint later, as silicone resists paint and will create a blotchy, uneven finish.
Tools You Will Need
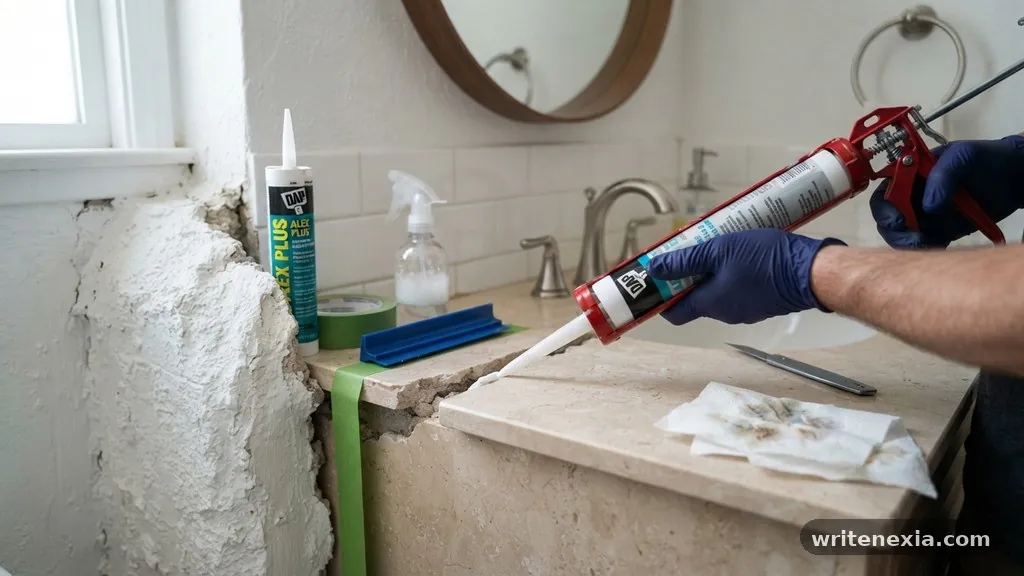
Having the right equipment on hand makes the process significantly smoother. You do not need expensive power tools, but a few basics are essential for a professional finish.
- Caulk gun for consistent application
- Utility knife with spare blades for trimming
- Painter’s tape for clean, sharp lines
- Putty knife for pressing in backer rods
- Silicone smoothing tool or plastic spreader
- Rubbing alcohol for cleaning the surface
- Measuring tape and pencil for marking cuts
Scribing for a Perfect Fit
When your wall is wavy, a straight piece of wood trim will leave gaps behind it. You must “scribe” the trim to match the wall’s contour to achieve a seamless look. Hold your filler strip against the wall in its intended position.
Use a compass or a simple block of wood with a pencil to trace the shape of the wall onto the filler strip. Cut along this line with a jigsaw or coping saw, then test the fit.
This process may take several attempts, but it is the hallmark of high-quality craftsmanship. Once the strip fits the wall’s curve, it will look like it was meant to be there. After the strip is secured, you only need a very thin bead of caulk to seal the microscopic remaining space.
This method is far superior to trying to fill a large, irregular gap with buckets of caulk. It provides a permanent, solid finish that will not crack over time.
When to Call a Professional
Sometimes, the gap between the vanity and the wall is indicative of a larger structural issue. If your vanity is pulling away from the wall because the floor is sagging or the wall studs are compromised, simply filling the gap is not enough.
You may need to address the underlying cause by shimming the cabinet from underneath or reinforcing the wall framing. If you notice large cracks appearing in the drywall or if the vanity appears to be leaning, consult a carpenter or a general contractor.
Professional help is also recommended if you are dealing with expensive stone or marble countertops. Cutting stone to fit an uneven wall is a precise task that requires specialized diamond-tipped blades and experience.
If you are not comfortable making these cuts, it is safer to hire a countertop fabricator. They can often create a custom splash or side panel that perfectly matches your stone, providing a much higher-end finish than DIY trim methods.
Frequently Asked Questions
Can I just use more caulk for a large gap?
No, using excess caulk is a common mistake. If the gap is larger than 1/4 inch, the sealant will likely sag, crack, or fail to adhere properly. Always use a backer rod or a physical filler strip for gaps wider than this to ensure a long-lasting, professional result.
What is the best way to clean up excess silicone?
You should remove excess silicone while it is still wet using a smoothing tool or a gloved finger. If the silicone has already dried, use a plastic scraper to carefully lift the edges and peel it away. Avoid using metal scrapers, as they can scratch your vanity or wall surfaces.
Is it necessary to use a backer rod?
A backer rod is highly recommended for gaps between 1/4 and 1/2 inch. It provides a solid foundation for the sealant, preventing it from sinking into the wall void. This ensures your caulk bead remains uniform and flexible, which is essential for a waterproof seal.
Can I paint over silicone caulk?
You generally cannot paint over silicone. The material is designed to repel moisture and other substances, which means paint will not adhere to it. If you need a paintable gap filler, look for a high-quality acrylic latex caulk, though keep in mind it is less waterproof than silicone.
How do I know if the gap is caused by a structural issue?
If the gap is growing over time, or if you see cracks forming in the drywall above the vanity, it may indicate that your floor joists are sagging or the wall is shifting. In these cases, it is best to have a professional evaluate the structural integrity of the area before attempting a cosmetic fix.
Final Thoughts
Bridging the space between your vanity and the wall is a manageable task if you choose the right approach for the size of the opening. Whether you use a simple backer rod for minor imperfections or a custom-fit filler strip for larger voids, the goal is always to create a moisture-proof seal. By taking the time to measure accurately and prepare your surfaces, you can achieve a professional look that protects your bathroom from water damage.
Do not settle for messy, cracked caulk beads that will only require repair later. Take the initiative to address the issue properly, and you will enjoy a clean, finished bathroom aesthetic for years to come. If you find the work challenging, remember that even small, careful improvements make a significant difference in the final result.
Leave a Reply
Selecting the right surface for your bathroom renovation often comes down to a battle between aesthetics and utility. When evaluating Quartz vs Cultured Marble Vanity Tops, the primary concern for many homeowners involves how these materials handle the inevitable spills of daily grooming products. Makeup, hair dyes, and nail polish removers contain harsh chemicals that can quickly ruin a porous surface.
Understanding the chemical composition of your vanity top is the first step toward protecting your investment. This article examines the durability, stain resistance, and long-term performance of these two popular choices to help you make an informed decision for your home.
When considering Quartz vs Cultured Marble Vanity Tops, the clear winner for stain resistance is engineered quartz. Quartz is non-porous and manufactured with resins that create a high-performance barrier against liquids and pigments. In contrast, cultured marble is a man-made blend of crushed stone and polyester resin, protected by a thin layer called a gel coat.
While this gel coat offers some protection, it is susceptible to micro-abrasions and chemical etching from common bathroom substances. If you frequently use heavy makeup or reactive hair products, quartz offers a significantly more reliable defense against permanent discoloration.
The Chemical Composition of Quartz
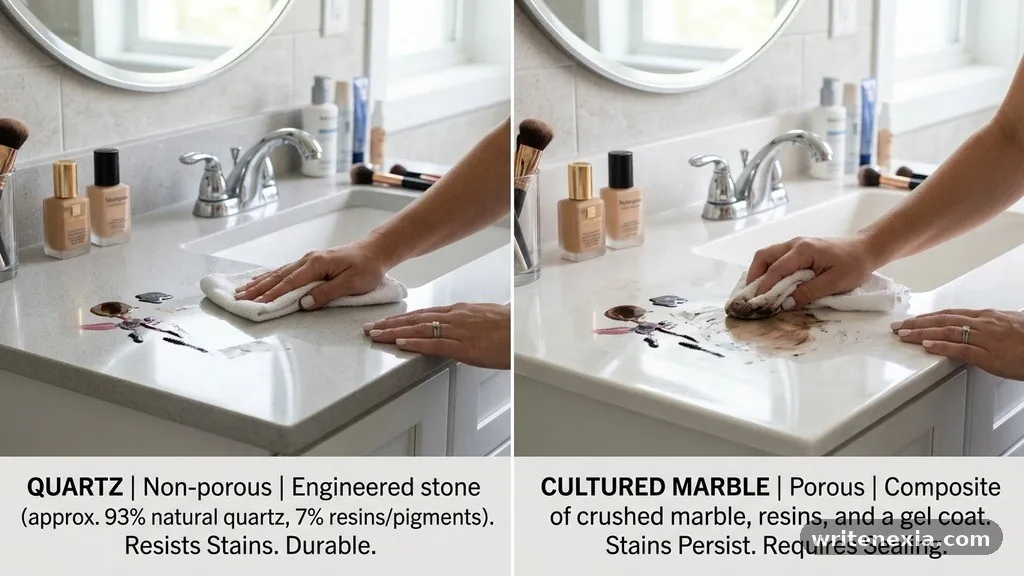
Engineered quartz is a high-tech material composed of approximately 90 to 93 percent crushed natural stone and 7 to 10 percent polymer resins and pigments. This combination is cured under intense heat and pressure to create a slab that is extremely dense and virtually non-porous.
Unlike natural stone, there are no microscopic fissures or veins for liquids to penetrate. Because it lacks these gaps, pigments from makeup or dyes simply sit on the surface until they are wiped away.
The manufacturing process ensures that the material is consistent throughout the entire slab. You do not have to worry about a protective coating wearing off over time because the integrity of the surface is inherent to its structure.
This makes it an ideal candidate for high-traffic bathrooms where spills are a daily occurrence. You can clean it with mild soap and water, and it generally does not require the periodic sealing that natural granite or marble vanity tops demand.
Understanding Cultured Marble Construction
Cultured marble is distinct from natural stone because it is a composite material formed in a mold. It consists of a base of pulverized limestone or marble dust mixed with liquid polyester resin.
Once this mixture cures in a mold, it is coated with a clear, protective layer known as a gel coat. This top layer provides the glossy finish and the initial barrier against moisture and stains.
The weakness of cultured marble lies in the vulnerability of this outer shell. While the gel coat is designed to be durable, it can be scratched by abrasive cleaning pads or etched by acidic substances like harsh makeup removers or vinegar-based cleaners.
Once the gel coat is compromised, the porous interior of the vanity top is exposed to moisture and pigments. This can lead to deep-seated stains that are nearly impossible to remove without professional refinishing.
Comparing Stain Resistance Performance
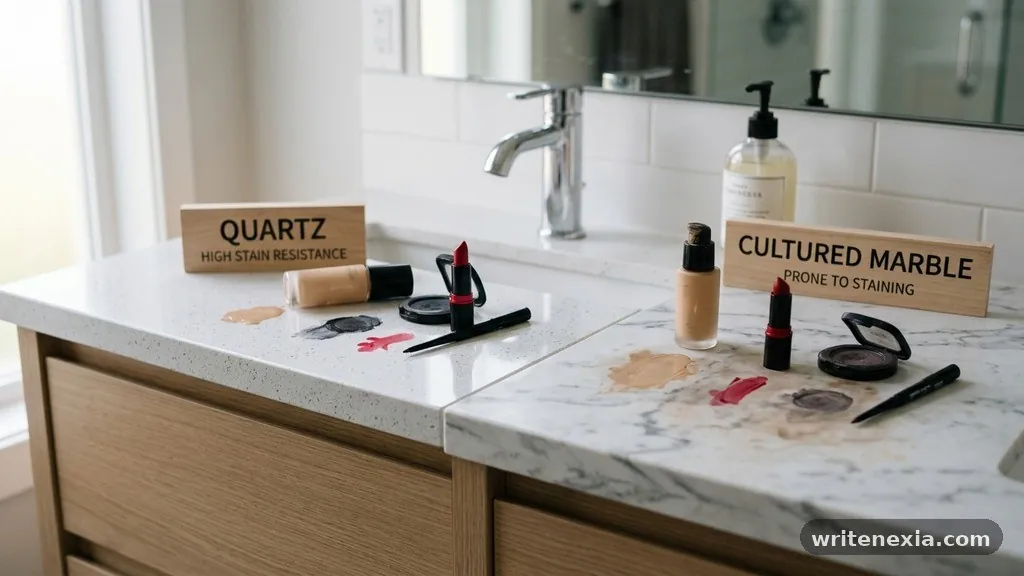
To visualize how these two materials handle common bathroom hazards, consider the following breakdown of their physical properties. While both are engineered, their reaction to household chemicals differs based on their surface chemistry. The table below highlights key performance indicators for each material.
| Feature | Engineered Quartz | Cultured Marble |
|---|---|---|
| Porosity | Non-porous | Low (if gel coat is intact) |
| Chemical Resistance | High | Moderate |
| Surface Hardness | Very High | Moderate |
| Stain Vulnerability | Low | High (if scratched) |
As shown in the table, the primary difference is how they handle the “life cycle” of a vanity top. Quartz maintains its resistance for decades because it is solid throughout.
Cultured marble relies entirely on the integrity of the thin gel coat. If your bathroom routine involves products that can scratch or dissolve this coating, your vanity top will gradually lose its ability to repel stains.
The Impact of Makeup and Cosmetic Chemicals
Makeup products, particularly liquid foundations and bold lipsticks, often contain oils and synthetic pigments designed to adhere to skin. These same properties make them highly effective at staining household surfaces.
On a quartz vanity, these pigments remain on the surface, allowing for easy removal with a simple microfiber cloth. If a smudge dries, a mild household cleaner is usually sufficient to dissolve the residue without leaving a mark.
Cultured marble is more sensitive to the solvents found in nail polish remover or certain hair treatments. If these substances sit on the surface, they can soften the resin-based gel coat. Once the surface texture changes, it becomes “tacky,” which traps makeup particles more effectively.
Over time, this creates a dull, stained patch that cannot be wiped clean. For more information on how different materials react to household pollutants, you can review the Environmental Protection Agency resources on indoor materials.
Maintenance Requirements for Long-Term Beauty
Maintaining a quartz vanity is remarkably straightforward because it does not require specialized care. Because it is non-porous, bacteria and mold struggle to find a foothold, which is a major advantage in a humid bathroom environment. You simply need to avoid harsh scouring powders or steel wool that could potentially dull the finish over many years of use.
Cultured marble requires a more delicate touch to preserve its aesthetic appeal. You must avoid abrasive cleaners entirely, as they will degrade the gel coat and expose the material beneath.
If you choose this material, frequent cleaning is necessary to ensure that makeup residue does not have time to set. Owners of these vanities often find that they need to be more vigilant about wiping down the counter after every use to prevent long-term discoloration.
Aesthetic Versatility and Design
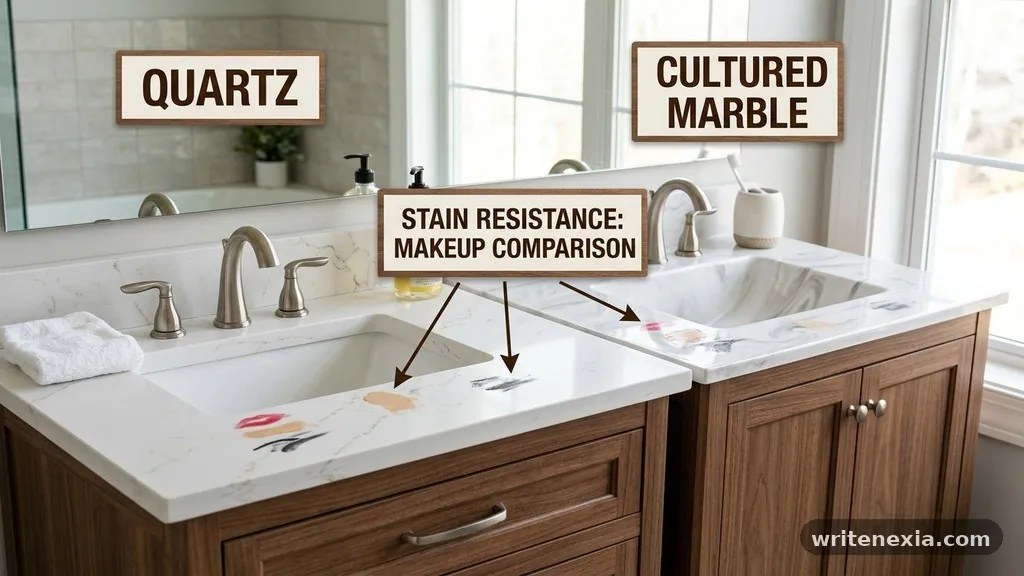
Both materials offer a wide range of visual options to suit different bathroom styles. Quartz is highly prized for its ability to mimic the look of natural stone while offering superior performance. You can find options that feature complex veining or subtle flecks, allowing you to achieve a high-end, luxurious look without the risks associated with natural marble.
Cultured marble is also available in a vast array of colors and patterns. Because it is cast in a mold, it can be manufactured with an integrated sink bowl, which eliminates the seam between the counter and the basin.
This seamless design is a major advantage for cleanliness, as it removes the crevices where makeup and debris typically accumulate. However, the trade-off is that you are locked into that specific integrated shape, whereas quartz allows for a variety of undermount or vessel sink installations.
Factors Influencing Your Final Decision
When deciding between these options, you should evaluate your daily habits and the amount of traffic your bathroom receives. If your vanity is used by multiple people, particularly children or teenagers who may not be as careful with makeup or hair products, quartz is the safer, more durable choice. Its resistance to heat and scratching makes it a “set it and forget it” material that holds up well under pressure.
Cultured marble is often chosen for guest bathrooms or secondary baths where the aesthetic preference for an integrated sink outweighs the need for extreme chemical resistance. It is often more budget-friendly than premium quartz, providing a cost-effective way to update a space. If you are prepared to follow a stricter maintenance routine and avoid abrasive cleaners, it can remain beautiful for a long time.
Common Myths About Surface Staining
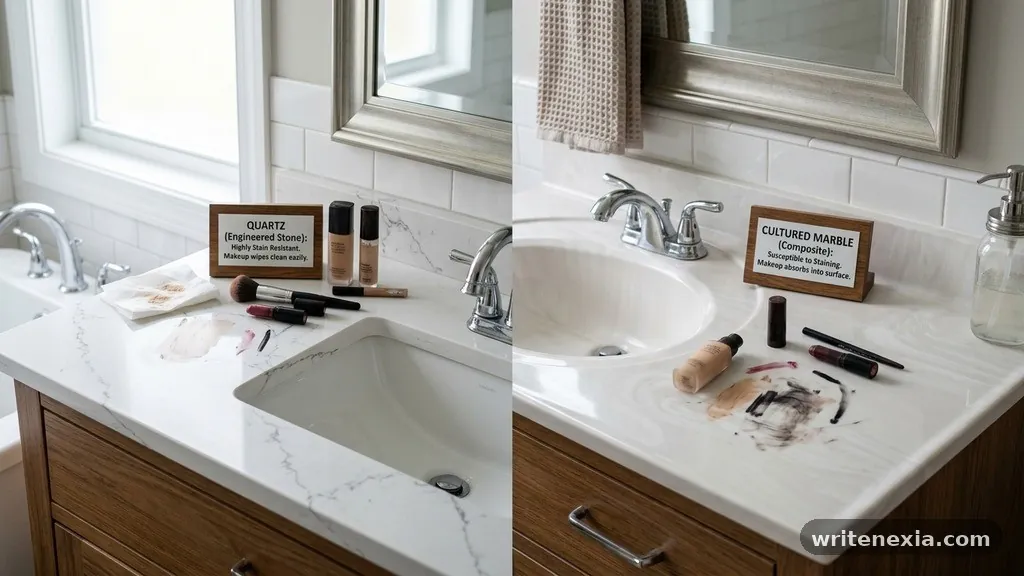
There is a common misconception that all stone-like materials are equally difficult to keep clean. Many people assume that because cultured marble contains the word “marble,” it shares the same high-maintenance requirements as the natural stone. In reality, it is a plastic-based composite, which behaves more like a hard resin than a natural mineral.
Another myth is that quartz is “indestructible.” While it is highly resistant to stains, it is not impervious to everything.
Extremely high heat can damage the resins in quartz, and prolonged exposure to very harsh chemicals like paint strippers can eventually etch the surface. However, when comparing Quartz vs Cultured Marble Vanity Tops, the threshold for damage is significantly higher with engineered quartz.
Strategies for Preventing Permanent Stains
If you decide to install a vanity top that is more prone to staining, you can take proactive steps to protect the surface. Using decorative trays for your makeup bottles is a simple way to prevent spills from touching the counter directly. This creates a physical barrier that keeps the surface clean and organized.
Additionally, establishing a “wipe-down” routine is essential. Even with the most stain-resistant materials, letting makeup residue sit for days can make removal more difficult.
Using a gentle, pH-balanced cleanser ensures that you aren’t stripping the finish of your vanity top while you clean. By keeping the surface clear of standing liquids, you significantly extend the lifespan of your bathroom fixtures.
Common Questions Regarding Vanity Surfaces
Is it possible to repair a stained cultured marble vanity top?
Yes, minor stains and surface scratches can often be buffed out using specialized polishing compounds designed for gel-coated surfaces. However, if the stain has penetrated the gel coat into the underlying material, it may require professional refinishing or a complete replacement of the top.
Can I use bleach on my vanity top to remove makeup stains?
You should generally avoid using bleach on both quartz and cultured marble. Bleach is too harsh for the resin components in both materials and can cause discoloration, dullness, or even structural damage to the protective finish over time.
Does the color of the vanity top affect its stain resistance?
While the material composition is the primary factor, lighter colors often show stains more readily than darker, patterned surfaces. However, because quartz is non-porous, even white quartz will resist staining better than a dark-colored cultured marble that has been scratched.
Are integrated sinks better for preventing makeup buildup?
Integrated sinks are excellent for hygiene because they remove the caulk line between the sink and the countertop, which is a common site for grime accumulation. If you choose a material with an integrated sink, you eliminate the risk of makeup getting trapped in the junction.
How often should I seal my quartz vanity top?
One of the primary benefits of engineered quartz is that it never requires sealing. The manufacturing process creates a non-porous surface that is ready for use immediately upon installation and stays that way without additional maintenance.
Evaluating the Long-Term Investment
Choosing between Quartz vs Cultured Marble Vanity Tops requires balancing your immediate budget with your long-term maintenance expectations. Quartz represents a higher upfront cost but offers superior durability and peace of mind, especially in households where makeup and grooming products are used daily. Its non-porous nature makes it exceptionally resistant to the pigments and chemicals that typically cause staining in a bathroom.
Cultured marble remains a popular choice for those who value the convenience of an integrated sink and a more approachable price point. While it is more susceptible to surface damage, careful use and routine cleaning can keep it looking pristine for many years.
Ultimately, your choice should reflect your lifestyle, your design preferences, and the level of maintenance you are willing to commit to. If you prioritize a surface that will remain essentially unchanged by your daily routine, investing in high-quality engineered quartz is the most effective way to ensure your bathroom vanity remains as beautiful as the day it was installed.
Leave a Reply
A beautifully designed living room doesn’t happen by accident. The spaces that instantly catch your attention on Pinterest or in interior design magazines usually follow a few simple decorating principles that create balance, comfort, and visual harmony. The good news is that you don’t need an unlimited budget or professional design experience to achieve the same polished look in your own home.
I’ve noticed that many homeowners focus on buying expensive furniture before considering layout, color, lighting, and accessories. In reality, designers often create luxurious spaces by thoughtfully layering textures, mixing materials, and arranging furniture to improve both beauty and functionality.
One mistake many people make is decorating one item at a time without considering how every piece works together. A designer-inspired living room feels cohesive because every color, texture, and accessory supports the overall style rather than competing for attention.
In this guide, you’ll learn ten designer-approved decorating ideas that can transform any living room into a space that feels elegant, welcoming, and timeless. Whether your style is modern, farmhouse, Scandinavian, coastal, or transitional, these ideas will help you create a room that looks professionally designed while remaining comfortable enough for everyday living.
If you’re ready to elevate your home, these tips will show you How to Decorate a Living Room Like a Designer with confidence.
Table of Contents

Personal Finishing Touches
Add meaningful décor that makes the space uniquely yours.
Balanced Furniture Layout
Arrange furniture for comfort and natural flow.
Layered Lighting
Create warmth with multiple light sources.
Cohesive Color Palette
Build a timeless foundation with coordinated colors.
Mixed Textures
Add depth using layered materials and fabrics.
Statement Area Rug
Anchor the room with the perfect foundation.
Oversized Wall Art
Create a bold focal point that elevates the space.
Decorative Coffee Table Styling
Style your centerpiece like a professional designer.
Natural Greenery
Bring life and freshness into your living room.
Custom Window Treatments
Frame your windows for a polished designer finish.
1. Balanced Furniture Layout

Quick Benefits
- Improves traffic flow
- Makes rooms feel larger
- Creates conversation areas
- Maximizes functionality
- Designer-inspired appearance
Why It Works
Professional designers begin with furniture placement because it determines how the room functions. A balanced layout creates natural walking paths while encouraging conversation and relaxation. Instead of pushing every piece against the walls, thoughtful spacing allows the room to feel open, comfortable, and visually connected.
I’ve found that floating furniture slightly away from the walls often makes living rooms appear larger than traditional layouts.
How To Style It
Arrange seating around a central focal point like a fireplace, coffee table, or entertainment center. Leave comfortable walking space between furniture pieces and avoid blocking natural pathways.
Use matching side tables or accent chairs to create visual balance throughout the room.
2. Layered Lighting

Quick Benefits
- Creates cozy ambiance
- Improves functionality
- Adds visual warmth
- Highlights décor
- Makes rooms feel luxurious
Why It Works
Designer living rooms rarely rely on a single ceiling fixture. Instead, they combine overhead lighting, table lamps, floor lamps, and accent lighting to create depth and atmosphere throughout the day.
I’ve noticed that layered lighting instantly makes even simple living rooms feel more inviting and professionally designed.
How To Style It
Combine a ceiling fixture with table lamps, floor lamps, and candles or LED accent lighting. Choose warm white bulbs to create a soft, welcoming glow.
Position lighting at different heights to add dimension and eliminate dark corners.
3. Cohesive Color Palette

Quick Benefits
- Creates visual harmony
- Timeless appearance
- Easier decorating
- Makes rooms feel polished
- Supports seasonal updates
Why It Works
A limited color palette allows every furniture piece and accessory to work together naturally. Rather than introducing too many competing colors, designers often build rooms around neutral foundations with carefully selected accent shades.
One thing that works especially well is repeating accent colors throughout pillows, artwork, rugs, and decorative objects.
How To Style It
Choose two or three primary colors supported by warm neutrals like ivory, beige, gray, or taupe. Introduce accent colors through throw pillows, artwork, blankets, and decorative accessories.
Keep large furniture neutral for long-term flexibility.
4. Mixed Textures

Quick Benefits
- Adds depth
- Makes rooms feel cozy
- Creates luxury appeal
- Prevents flat designs
- Timeless decorating technique
Why It Works
Texture is one of the easiest ways to make a living room feel professionally styled. Combining smooth, soft, woven, and natural materials creates visual interest without relying on excessive color or patterns.
I’ve seen rooms transformed simply by layering linen, boucle, wood, leather, glass, and woven baskets together.
How To Style It
Mix velvet or linen pillows with knitted throws, woven baskets, wooden furniture, ceramic vases, and natural fiber rugs.
Balance rough textures with smooth finishes to maintain a sophisticated appearance.
5. Statement Area Rug

Quick Benefits
- Defines the room
- Anchors furniture
- Adds warmth
- Introduces texture
- Completes the design
Why It Works
A properly sized area rug brings every furniture piece together while creating a comfortable foundation for the room. Designers often use oversized rugs because they make living spaces appear larger and more cohesive.
I’ve found that rugs also soften hardwood floors while improving comfort and reducing noise throughout the home.
How To Style It
Choose a rug large enough for at least the front legs of all seating to rest on it. Select neutral patterns or subtle textures that complement your overall color palette.
Layer decorative pillows and accessories that coordinate with the rug for a cohesive designer look.
6. Oversized Wall Art

Quick Benefits
- Creates an instant focal point
- Makes rooms feel larger
- Adds personality
- Reduces wall clutter
- Designer-inspired finish
Why It Works
Large-scale artwork immediately draws the eye and gives the living room a polished, intentional appearance. Instead of filling walls with several small pieces, designers often choose one oversized artwork to create a bold statement while maintaining a clean and sophisticated look.
I’ve noticed that oversized artwork helps anchor the seating area and makes ceilings appear taller, especially in rooms with neutral color palettes.
How To Style It
Hang a large canvas, framed abstract print, or landscape artwork above the sofa, keeping the center of the piece at eye level. Choose artwork that echoes your room’s color palette without matching everything exactly.
Pair the artwork with subtle decorative accessories so it remains the focal point of the room.
7. Decorative Coffee Table Styling

Quick Benefits
- Adds designer detail
- Creates visual balance
- Easy seasonal updates
- Functional and beautiful
- Elevates everyday décor
Why It Works
A thoughtfully styled coffee table makes a living room feel finished without appearing cluttered. Designers often group decorative objects in odd numbers while varying heights and textures to create natural balance and visual interest.
One thing that works especially well is combining decorative pieces with practical items so the table remains useful for everyday living.
How To Style It
Style your coffee table using a decorative tray, stacked coffee table books, a ceramic vase with fresh greenery, and a scented candle. Leave open space around the arrangement to avoid an overcrowded appearance.
Refresh accessories seasonally while keeping the overall styling simple and cohesive.
8. Natural Greenery

Quick Benefits
- Brings life into the room
- Improves visual freshness
- Softens hard surfaces
- Complements every style
- Creates relaxing atmosphere
Why It Works
Plants introduce natural color, texture, and movement that make living rooms feel more welcoming. Whether you choose real or high-quality artificial greenery, plants soften furniture and architectural lines while creating a healthier, more vibrant atmosphere.
I’ve found that even one large indoor plant can dramatically change the energy of a room by making it feel brighter and more inviting.
How To Style It
Place a large fiddle leaf fig, olive tree, rubber plant, or bird of paradise in an empty corner. Add smaller plants to bookshelves, side tables, and console tables using ceramic or woven planters.
Mix plant heights to create a layered, natural look throughout the space.
9. Custom Window Treatments

Quick Benefits
- Makes ceilings appear taller
- Softens natural light
- Adds elegance
- Improves privacy
- Completes the room
Why It Works
Window treatments frame the room and help control both light and privacy while adding softness to the overall design. Designers typically install curtains higher and wider than the window frame to make windows appear larger and ceilings feel taller.
I’ve noticed that full-length curtains instantly make even modest living rooms feel more luxurious.
How To Style It
Hang linen or cotton curtains close to the ceiling and allow them to extend to the floor. Choose neutral fabrics like ivory, beige, soft gray, or warm white for a timeless appearance.
Layer sheer curtains behind heavier drapes for flexibility throughout the day.
10. Personal Finishing Touches

Quick Benefits
- Makes the room unique
- Reflects your personality
- Adds warmth
- Creates meaningful décor
- Prevents showroom appearance
Why It Works
The most memorable designer spaces include carefully chosen personal elements that tell a story. Family photographs, travel souvenirs, favorite books, handmade pottery, and collected treasures give a living room authenticity while making it feel comfortable rather than overly staged.
That’s why professional designers rarely decorate entirely with brand-new accessories. Mixing personal items with decorative pieces creates a home that feels lived in and timeless.
How To Style It
Display meaningful objects on bookshelves, consoles, and coffee tables while keeping arrangements uncluttered. Mix framed photographs with candles, ceramics, books, and natural materials for balance.
Rotate decorative accessories seasonally to keep the room feeling fresh without completely redesigning the space.
Frequently Asked Questions
How do designers make a living room look expensive?
Designers focus on balanced layouts, layered lighting, quality textures, oversized rugs, cohesive color palettes, and carefully selected accessories rather than simply buying expensive furniture.
What colors make a living room feel timeless?
Neutral shades like warm white, ivory, beige, taupe, soft gray, and greige provide a timeless foundation. Accent colors such as sage green, navy, black, or terracotta can be introduced through décor and textiles.
How do I decorate a small living room like a designer?
Choose appropriately scaled furniture, use mirrors to reflect light, keep the color palette simple, incorporate vertical storage, and avoid overcrowding the room with unnecessary décor.
What is the biggest decorating mistake in a living room?
One of the most common mistakes is choosing furniture that’s too small or placing all furniture against the walls. Proper scale and thoughtful furniture placement create a much more balanced and inviting space.
How often should I update my living room décor?
Large furniture can remain timeless for many years, while smaller accessories like pillows, throws, artwork, and decorative objects can be updated seasonally or whenever you want a fresh new look.
How do I make my living room feel cozy without clutter?
Layer soft textures, add warm lighting, include natural greenery, and decorate with a few meaningful accessories instead of filling every surface. Thoughtful styling creates comfort while maintaining an open and organized appearance.
Conclusion
Decorating a living room like a designer isn’t about spending more—it’s about making thoughtful choices that create balance, comfort, and timeless style. From arranging furniture with intention to layering lighting, textures, greenery, and personal accessories, every detail contributes to a space that feels both beautiful and functional.
The most inviting living rooms combine practical layouts with carefully selected décor that reflects the people who live there. By focusing on quality over quantity and building your design one layer at a time, you can create a room that feels polished without looking overly staged.
Start by implementing one or two of these designer-inspired ideas, then gradually refine your space as your style evolves. Before long, you’ll have a living room that’s comfortable for everyday life and impressive enough to save on Pinterest for years to come.
Related Articles
- How to Decorate a Bedroom on a Budget
- 10 Bedroom Wall Decor Ideas That Look Designer Made
- 10 DIY Wall Art Ideas Anyone Can Make
- 10 Modern DIY Coffee Table Ideas
- 10 Living Room Wall Decor Ideas You’ll Love
Leave a Reply
A clutter-free home isn’t about achieving perfection—it’s about creating a space that feels calm, functional, and enjoyable to live in every day. Whether you’re constantly searching for misplaced items, feeling overwhelmed by overflowing storage, or simply wanting a fresh start, decluttering can completely transform both your home and your daily routine.
I’ve noticed that many people avoid decluttering because they think it requires an entire weekend or a massive organizational overhaul. In reality, the most successful home transformations happen one room at a time. Small, consistent changes are often easier to maintain and create lasting results.
One mistake many homeowners make is organizing clutter instead of removing it. While attractive storage bins and baskets can certainly help, they work best after you’ve decided what truly deserves a place in your home.
In this guide, you’ll discover ten practical strategies that make decluttering every room feel manageable rather than overwhelming. From kitchens and bedrooms to bathrooms and entryways, these simple ideas will help you create a home that’s easier to clean, more relaxing to enjoy, and beautifully organized.
If you’re ready to simplify your space and your daily routine, this guide on How to Declutter Every Room in Your Home will help you get started with confidence.
Table of Contents

Garage & Storage Areas
Organize bulky items with smart long-term storage solutions.
Start Small
Build momentum with manageable decluttering tasks.
Entryway Reset
Create an organized and welcoming first impression.
Living Room Simplify
Clear surfaces and organize everyday essentials.
Kitchen Essentials
Keep only the tools and items you regularly use.
Bedroom Refresh
Turn your bedroom into a peaceful, clutter-free retreat.
Bathroom Organization
Streamline toiletries and create a spa-like space.
Closet Cleanout
Simplify your wardrobe and maximize storage.
Home Office Declutter
Organize your workspace for better focus and productivity.
Kids’ Room Storage
Make toy and book organization simple and accessible.
1. Start Small
Quick Benefits
- Prevents feeling overwhelmed
- Builds motivation
- Creates quick wins
- Easier to maintain
- Encourages daily habits
Why It Works
Trying to declutter an entire house in one day often leads to frustration and unfinished projects. Starting with one drawer, one shelf, or one small corner helps you see immediate progress while building confidence for larger spaces.
I’ve found that completing a small task motivates you to continue because the results are visible almost immediately.
How To Style It
Choose one small area and prepare three containers labeled Keep, Donate, and Discard. Focus only on that space before moving to the next one.
Celebrate each completed area instead of worrying about the entire house.
2. Entryway Reset

Quick Benefits
- Reduces daily clutter
- Makes leaving home easier
- Welcoming appearance
- Better organization
- Saves time
Why It Works
The entryway collects shoes, keys, bags, jackets, and mail faster than almost any other area. Creating designated storage prevents these everyday items from spreading throughout the rest of the home.
I’ve noticed that organized entryways make the entire home feel cleaner because clutter never gets the chance to travel from room to room.
How To Style It
Use a slim console table with baskets underneath, wall hooks for coats and bags, and a tray for keys and sunglasses.
Add a small bench with hidden storage for shoes and seasonal accessories.
3. Living Room Simplify

Quick Benefits
- Creates relaxing atmosphere
- Easier to clean
- Reduces visual clutter
- Better entertaining space
- More functional layout
Why It Works
Living rooms often become storage spaces for magazines, blankets, electronics, toys, and decorative accessories. Removing unnecessary items instantly makes the room feel larger and more peaceful.
One thing that works especially well is limiting decorative accessories to a few meaningful pieces rather than filling every available surface.
How To Style It
Store remotes, chargers, and small electronics inside decorative baskets or coffee table drawers. Display only a few books, candles, and plants on open surfaces.
Use closed storage furniture whenever possible to hide everyday clutter.
4. Kitchen Essentials

Quick Benefits
- Improves cooking efficiency
- Frees cabinet space
- Easier meal preparation
- Cleaner countertops
- Better pantry organization
Why It Works
Kitchens accumulate duplicate utensils, expired pantry items, unused appliances, and mismatched containers over time. Removing what you no longer use makes cooking faster while keeping storage organized.
I’ve found that clear countertops instantly make kitchens feel larger and significantly easier to maintain.
How To Style It
Empty one cabinet at a time and remove duplicate tools, expired food, and unused gadgets. Store everyday items within easy reach and relocate seasonal appliances to higher shelves.
Use clear containers and drawer organizers to keep everything visible.
5. Bedroom Refresh

Quick Benefits
- Promotes better sleep
- Creates calming atmosphere
- Easier morning routine
- Reduces stress
- Maximizes storage
Why It Works
Bedrooms should feel restful rather than crowded. Removing unnecessary furniture, excess clothing, and decorative clutter creates a peaceful environment that supports relaxation and better sleep.
I’ve noticed that simplified bedrooms often feel more luxurious because every piece serves a purpose.
How To Style It
Keep bedside tables simple with a lamp, book, and small decorative item. Donate clothing you no longer wear and use storage bins under the bed for seasonal items.
Choose matching storage baskets inside closets for a clean, organized appearance.
6. Bathroom Organization

Quick Benefits
- Frees up counter space
- Simplifies daily routines
- Reduces product waste
- Easier cleaning
- Creates a spa-like feel
Why It Works
Bathrooms tend to collect expired products, duplicate toiletries, and items that are rarely used. Decluttering these essentials creates a cleaner, more relaxing space while making your morning and evening routines much more efficient.
I’ve found that organized bathroom counters instantly make the entire room feel larger, brighter, and more luxurious without spending any money on renovations.
How To Style It
Remove expired products and keep only daily essentials on the countertop. Store extra toiletries inside labeled baskets or drawer organizers, and use clear containers for cotton balls, swabs, and bath salts.
Finish the space with neatly folded white towels, a small plant, and a decorative soap dispenser for a hotel-inspired look.
7. Closet Cleanout

Quick Benefits
- More outfit options
- Easier morning routine
- Creates extra storage
- Reduces decision fatigue
- Keeps clothing organized
Why It Works
Closets become cluttered when they contain clothing that no longer fits, outdated styles, or duplicate items. Removing pieces you no longer wear makes it much easier to see and enjoy the clothes you actually love.
One thing that works especially well is organizing clothing by category and color. This simple system keeps closets looking neat while making outfit planning much faster.
How To Style It
Sort clothing into Keep, Donate, and Sell piles. Use matching hangers for a clean appearance and store seasonal clothing in labeled bins on upper shelves.
Fold sweaters neatly and use drawer dividers for smaller accessories like belts, scarves, and socks.
8. Home Office Declutter

Quick Benefits
- Increases productivity
- Reduces distractions
- Keeps documents organized
- Improves concentration
- Creates a professional workspace
Why It Works
A cluttered desk often leads to a cluttered mind. Organizing paperwork, office supplies, and electronics creates a workspace that encourages focus while making everyday tasks feel more manageable.
I’ve noticed that people are far more productive when only the items they use daily remain on their desks.
How To Style It
Recycle unnecessary paperwork, organize important documents into labeled folders, and store office supplies inside drawers or desktop organizers.
Keep only your computer, notebook, lamp, and one decorative accessory visible to maintain a clean workspace.
9. Kids’ Room Storage

Quick Benefits
- Easier cleanup
- Teaches organization skills
- Reduces toy clutter
- Creates more play space
- Simplifies daily routines
Why It Works
Children’s rooms become cluttered quickly because toys, books, clothes, and craft supplies often lack designated storage. Creating simple organizational systems makes cleanup easier for both children and parents.
I’ve found that open bins with labels encourage kids to put items away because everything has an obvious place.
How To Style It
Use labeled storage bins for toys, books, stuffed animals, and art supplies. Rotate toys every few months to reduce clutter while keeping playtime exciting.
Choose low shelving so children can easily access and return their belongings independently.
10. Garage & Storage Areas

Quick Benefits
- Maximizes storage space
- Easier to find tools
- Improves safety
- Reduces household clutter
- Better long-term organization
Why It Works
Garages and storage rooms often become catch-all spaces for items that don’t have permanent homes. Decluttering these areas prevents unnecessary accumulation while making seasonal decorations, tools, and equipment much easier to access.
That’s why professional organizers recommend assigning every item a specific location rather than stacking boxes randomly throughout the room.
How To Style It
Install wall shelving, pegboards, ceiling storage racks, and labeled plastic bins to organize tools, sports equipment, holiday decorations, and gardening supplies.
Keep frequently used items within easy reach while storing seasonal belongings higher up.
Frequently Asked Questions
Where should I start when decluttering my home?
Start with the smallest and easiest area, such as a single drawer, bathroom cabinet, or bedside table. Small victories build momentum and make larger projects feel much more manageable.
How do I decide what to keep?
Keep items that you regularly use, truly need, or genuinely love. If something hasn’t been used in over a year and holds no sentimental value, it may be time to donate or recycle it.
How often should I declutter my home?
A quick monthly reset combined with a more thorough decluttering session every season helps prevent clutter from building up over time.
What should I do with items I no longer need?
Donate usable items to local charities, sell valuable belongings online, recycle whenever possible, and responsibly dispose of damaged items that can no longer be used.
How do I prevent clutter from coming back?
Adopt a “one in, one out” rule, return items to their designated places daily, and regularly evaluate belongings before they accumulate.
Is organizing the same as decluttering?
No. Decluttering focuses on removing unnecessary items, while organizing gives the remaining belongings a permanent and functional home. Decluttering should always come first.
Conclusion
Decluttering your home doesn’t have to happen all at once. By focusing on one room—or even one small area—at a time, you can make steady progress without feeling overwhelmed. Every drawer you organize, every shelf you clear, and every item you donate brings you one step closer to a home that feels calmer, cleaner, and easier to maintain.
The goal isn’t to create a picture-perfect house. Instead, it’s about designing a space that supports your daily life and reflects what truly matters to you. Simple habits like putting things back where they belong, limiting unnecessary purchases, and regularly reassessing your belongings make it much easier to maintain an organized home.
Start today with the room that causes you the most stress, and remember that even small improvements can have a lasting impact. Over time, you’ll enjoy a home that feels more peaceful, functional, and welcoming every single day.
Related Articles
- How to Decorate a Living Room Like a Designer
- How to Decorate a Bedroom on a Budget
- 10 Small Entryway Organization Ideas
- 10 Budget-Friendly Home Organization Ideas
- 10 DIY Storage Solutions for Every Room
Leave a Reply
A tiny bedroom can quickly feel cramped when every inch is filled with furniture, clothing, and everyday essentials. However, limited square footage doesn’t have to mean sacrificing comfort or style. With smart organization strategies and thoughtful storage solutions, even the smallest bedroom can become functional, relaxing, and beautifully organized.
I’ve noticed that professionally designed small bedrooms aren’t necessarily larger—they’re simply better planned. Every piece of furniture has a purpose, storage is used creatively, and clutter is kept to a minimum. The result is a room that feels open, calm, and surprisingly spacious.
One mistake many people make is trying to fit too much furniture into a small bedroom. Instead of making the room more useful, oversized pieces often block walkways and create visual clutter. Choosing multifunctional furniture and maximizing vertical space can completely change how a bedroom feels.
In this guide, you’ll discover ten practical organization ideas that help maximize every square foot without sacrificing style. Whether you’re decorating a small apartment, guest room, dorm, or compact primary bedroom, these tips will help you create a space that feels larger, cleaner, and easier to maintain.
If you’re ready to make the most of your space, this guide on How to Organize a Tiny Bedroom Like a Pro will show you where to start.
Table of Contents

Minimal Decorative Styling
Decorate intentionally to reduce visual clutter.
Under-Bed Storage
Make hidden storage space work harder.
Vertical Shelving
Use wall space to maximize organization.
Multifunctional Furniture
Choose furniture with built-in storage.
Declutter Daily
Keep your bedroom tidy with simple daily habits.
Closet Maximization
Double your closet storage capacity.
Floating Nightstands
Save floor space with wall-mounted storage.
Door Storage Solutions
Turn unused doors into valuable storage space.
Smart Drawer Organizers
Keep drawers neat and easy to access.
Light Color Palette
Use bright tones to make the room feel larger.
1. Under-Bed Storage

Quick Benefits
- Maximizes unused space
- Hides seasonal items
- Keeps floors clutter-free
- Easy to access
- Budget-friendly solution
Why It Works
The area beneath your bed is one of the largest unused storage spaces in a small bedroom. Instead of letting it collect dust, use it to store clothing, extra bedding, shoes, or seasonal décor. Keeping these items out of sight instantly makes the room feel more organized.
I’ve found that rolling storage bins make it easy to access belongings while maintaining a clean, uncluttered appearance.
How To Style It
Use low-profile storage containers with lids or rolling drawers that slide easily beneath the bed. Label each container for quick identification and choose matching bins for a more cohesive look.
A bed skirt can also hide storage while creating a polished finish.
2. Vertical Shelving

Quick Benefits
- Saves valuable floor space
- Adds decorative storage
- Displays personal items
- Creates visual height
- Easy DIY project
Why It Works
When floor space is limited, the walls become your best storage opportunity. Floating shelves and tall bookcases draw the eye upward, making ceilings appear higher while providing room for books, baskets, plants, and decorative accessories.
I’ve noticed that vertical storage helps tiny bedrooms feel larger because it keeps the floor clear and open.
How To Style It
Install floating shelves above the bed, desk, or dresser to display books, framed art, and decorative baskets. Use matching storage boxes to hide smaller everyday items while maintaining a clean appearance.
Keep shelves lightly styled to avoid visual clutter.
3. Multifunctional Furniture

Quick Benefits
- Saves space
- Reduces clutter
- Adds hidden storage
- Increases functionality
- Ideal for apartments
Why It Works
Furniture that serves more than one purpose is essential in compact bedrooms. Beds with built-in drawers, storage ottomans, lift-top benches, and nightstands with shelving help maximize every square foot without overcrowding the room.
One thing that works especially well is investing in furniture that eliminates the need for additional storage pieces.
How To Style It
Choose a storage bed with built-in drawers or place a storage bench at the foot of the bed. Use a nightstand with shelves or drawers to keep books, chargers, and personal items neatly organized.
Stick with furniture that has clean lines and a light finish to make the room feel more open.
4. Declutter Daily

Quick Benefits
- Prevents mess from building
- Easier cleaning
- Less visual stress
- Saves time
- Keeps room organized
Why It Works
Small bedrooms become cluttered much faster than larger spaces because there’s less room to hide everyday items. Spending just a few minutes each day returning belongings to their proper places keeps the room consistently tidy.
I’ve found that daily habits are much easier than tackling overwhelming weekend cleanups.
How To Style It
Make the bed each morning, return clothing to the closet, and keep bedside tables free of unnecessary items. Use a decorative basket for blankets or laundry to maintain a clean appearance.
Keep surfaces simple with only a lamp, book, and one decorative accessory.
5. Closet Maximization

Quick Benefits
- Creates more clothing storage
- Keeps wardrobes organized
- Simplifies dressing
- Reduces clutter
- Makes closets feel larger
Why It Works
Closets often have unused vertical space that can easily double storage capacity. Adding shelves, hanging organizers, and storage bins makes better use of every inch while keeping clothing visible and accessible.
I’ve noticed that matching hangers and organized sections instantly make even small closets feel professionally designed.
How To Style It
Install extra shelves above hanging clothes for folded sweaters and storage bins. Organize clothing by category and color while using slim matching hangers to maximize hanging space.
Store seasonal clothing in labeled containers on the highest shelves.
6. Floating Nightstands

Quick Benefits
- Frees up floor space
- Creates a modern look
- Provides essential storage
- Makes cleaning easier
- Perfect for tiny bedrooms
Why It Works
Traditional nightstands can make a small bedroom feel crowded by taking up valuable floor space. Floating nightstands provide the same functionality while keeping the room feeling open and airy. The visible floor beneath them creates the illusion of a larger space, which is a common trick used by interior designers.
I’ve found that floating furniture gives even the smallest bedrooms a clean, custom-built appearance that instantly feels more modern.
How To Style It
Install a floating nightstand beside the bed with one drawer or open shelf for nighttime essentials. Keep the surface simple with a small lamp, a favorite book, and a ceramic dish for jewelry or glasses.
Choose finishes like natural oak, matte white, or light walnut to maintain a bright, spacious feel.
7. Door Storage Solutions

Quick Benefits
- Uses overlooked space
- Adds hidden storage
- Keeps essentials accessible
- Budget-friendly upgrade
- Reduces countertop clutter
Why It Works
The back of a bedroom or closet door is valuable storage space that’s often ignored. Over-the-door organizers provide room for shoes, accessories, beauty products, handbags, and everyday essentials without taking up additional floor space.
One thing that works especially well is choosing organizers with fabric pockets that blend seamlessly into the room instead of looking bulky.
How To Style It
Hang an over-the-door organizer inside the closet for shoes, scarves, belts, or folded accessories. Install decorative hooks behind the bedroom door for robes, bags, or tomorrow’s outfit.
Choose neutral-colored organizers that coordinate with your room’s décor.
8. Smart Drawer Organizers

Quick Benefits
- Prevents messy drawers
- Makes items easy to find
- Maximizes storage
- Saves time daily
- Keeps everything organized
Why It Works
Messy drawers waste valuable storage space and make it difficult to find everyday items. Drawer dividers separate clothing, accessories, and personal items into organized sections, making even shallow drawers feel much larger.
I’ve noticed that organized drawers encourage people to keep their bedrooms tidy because everything has its own designated place.
How To Style It
Use adjustable drawer dividers for clothing and fabric organizers for socks, undergarments, jewelry, and accessories. Fold clothing vertically whenever possible to maximize visibility and storage capacity.
Keep similar items grouped together for easier daily routines.
9. Light Color Palette

Quick Benefits
- Makes rooms feel larger
- Reflects natural light
- Creates a calming atmosphere
- Timeless appearance
- Easy to decorate
Why It Works
Light colors reflect more natural light than darker shades, making compact bedrooms appear brighter and more spacious. Soft neutral tones also create visual continuity that prevents the room from feeling busy or crowded.
I’ve found that layering different shades of white, beige, gray, and soft earth tones creates depth while maintaining an open, airy feeling.
How To Style It
Choose white, ivory, warm beige, light gray, or soft greige for walls and bedding. Add warmth through natural wood furniture, woven baskets, and textured throw blankets.
Introduce subtle accent colors using pillows, artwork, and plants rather than large furniture pieces.
10. Minimal Decorative Styling

Quick Benefits
- Reduces visual clutter
- Creates peaceful atmosphere
- Easier to clean
- Highlights quality pieces
- Timeless designer look
Why It Works
Small bedrooms benefit from intentional decorating rather than filling every available surface. A few carefully chosen accessories create personality while allowing the room to feel calm, balanced, and spacious.
That’s why professional designers often follow the “less is more” approach when styling compact spaces. Every decorative piece should have a purpose.
How To Style It
Display only a few meaningful accessories, such as framed artwork, a ceramic vase, candles, or a small indoor plant. Keep open shelving lightly decorated and avoid overcrowding walls with excessive artwork.
Focus on quality over quantity to achieve a clean, sophisticated look.
Frequently Asked Questions
How do I organize a very small bedroom?
Start by decluttering unnecessary items, then maximize vertical storage, use under-bed storage, and choose multifunctional furniture. Keeping surfaces clear also helps the room feel larger.
What furniture works best in a tiny bedroom?
Storage beds, floating nightstands, wall-mounted shelves, slim dressers, storage benches, and foldable desks are excellent choices because they maximize functionality without taking up unnecessary space.
How can I make a tiny bedroom look bigger?
Use light-colored walls, mirrors, minimal décor, multifunctional furniture, and plenty of natural light. Keeping the floor visible also creates the illusion of more space.
How do I organize clothes in a small bedroom?
Use slim matching hangers, vertical folding methods, under-bed storage bins, hanging closet organizers, and seasonal storage containers to maximize every inch of available space.
What is the biggest mistake when organizing a small bedroom?
Overcrowding the room with oversized furniture and unnecessary décor. Choosing appropriately sized furniture and keeping only essential belongings creates a more functional and comfortable space.
How do I keep a tiny bedroom organized every day?
Make the bed each morning, return clothing to the closet, put items back after using them, and spend five minutes each evening tidying surfaces. Small daily habits prevent clutter from accumulating.
Conclusion
Organizing a tiny bedroom is all about making smart use of every available inch. By combining multifunctional furniture, creative storage solutions, and simple daily habits, you can create a room that feels spacious, peaceful, and easy to maintain. Even the smallest changes—like adding floating shelves, using under-bed storage, or simplifying your décor—can make a noticeable difference.
Remember that organization isn’t about fitting more into your bedroom; it’s about making the space work better for your lifestyle. Focus on keeping only the items you truly use and love, then give everything a designated place.
Start with one or two of these ideas today, and gradually transform your tiny bedroom into a beautifully organized retreat that feels larger, brighter, and far more comfortable than its square footage suggests.
Related Articles
- How to Decorate a Bedroom on a Budget
- 10 Bedroom Wall Decor Ideas That Look Designer Made
- 10 Small Bedroom Storage Ideas
- How to Declutter Every Room in Your Home
- 10 Apartment Bedroom Ideas for Small Spaces